Form customization with custom code
The standard appearance settings allow you to change fonts, colors, element rounding, and buttons. But sometimes that's not enough: you need to add a brand logo, set a background image or gradient, add a shadow or border around the form.
For this, the General tab has a Insert additional code block:
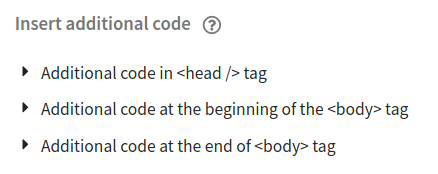
Three areas are available for inserting code:
- In the
<head>tag — for styles and scripts - After the opening
<body>tag — for additional elements - Before the closing
</body>tag — for analytics scripts
All examples below are inserted into the In the <head> tag field.
Adding a logo
Insert the code into the In the <head> tag field:
<script>
  document.addEventListener('DOMContentLoaded', function() {
    var firstElement = document.querySelector('.form .element');
    if (firstElement) {
      var logo = document.createElement('div');
      logo.style.textAlign = 'center';
      logo.style.marginBottom = '20px';
      logo.innerHTML = '<img src="https://example.com/logo.png" width="150" />';
      firstElement.parentNode.insertBefore(logo, firstElement);
    }
  });
</script>
What to replace:
https://example.com/logo.png— direct HTTPS link to your logowidth="150"— width in pixels (can use percentages, e.g.width="20%")'center'— alignment ('left','center','right')'20px'— spacing between the logo and the first form element
![]()
Use a PNG with a transparent background for the best result.
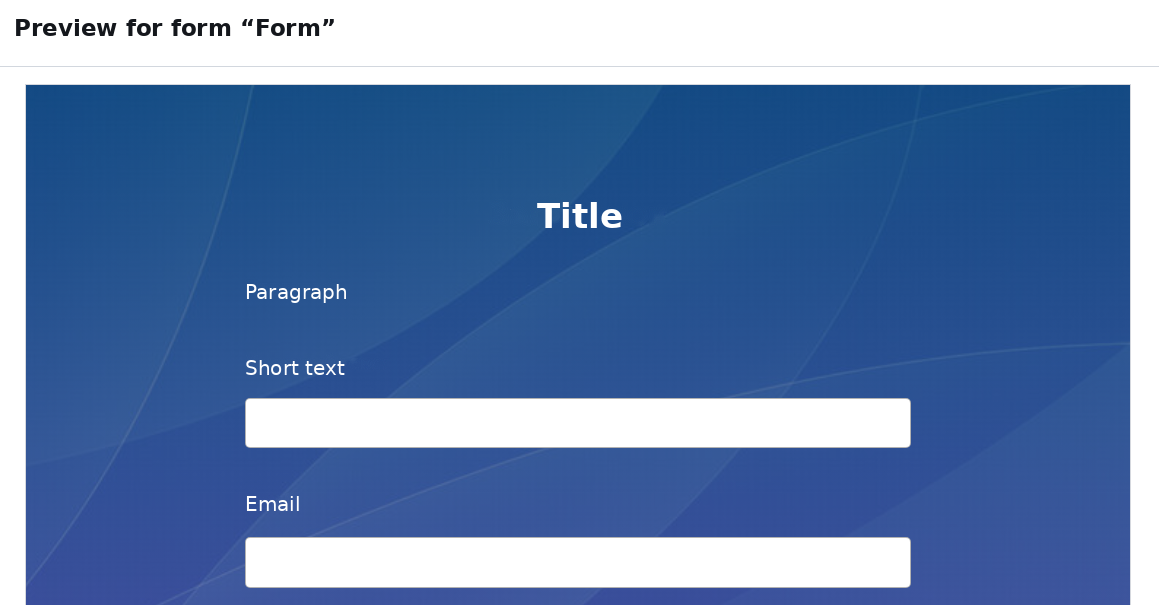
Background image or gradient
The Appearance interface only supports a solid background color. With custom code, you can set an image or gradient.
Background image
<style>
  body {
    background-image: url("https://example.com/background.jpg");
    background-size: cover;
    background-position: center;
    background-repeat: no-repeat;
    min-height: 100vh;
    margin: 0;
  }
</style>
Replace the link with your image. background-size: cover stretches the image to fill the screen, contain shows it entirely with possible empty areas on the edges.
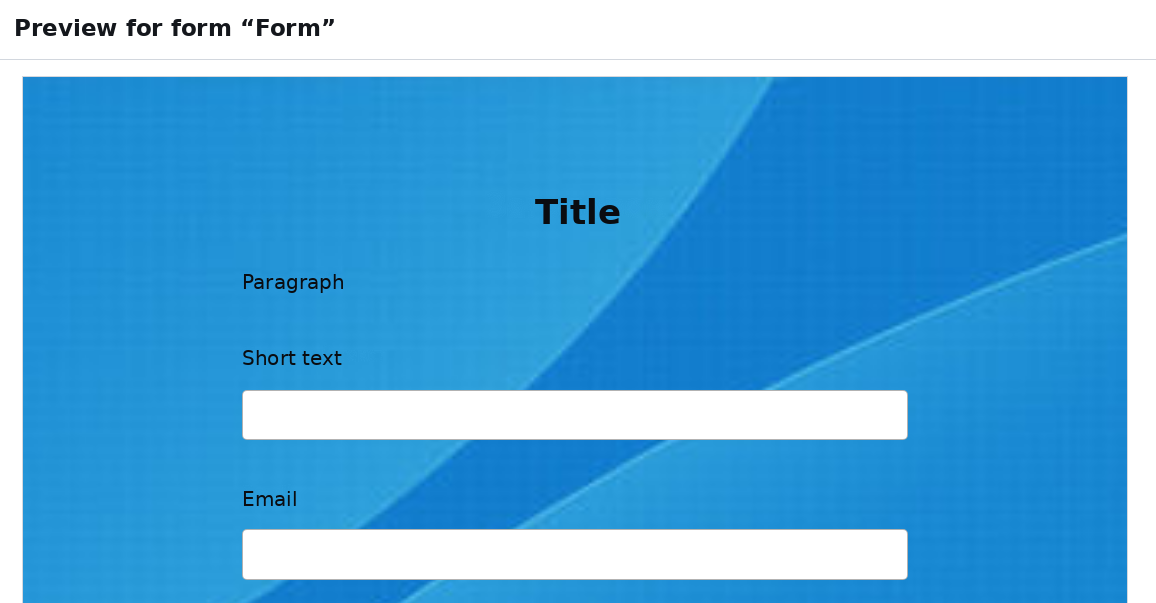
Gradient
<style>
  body {
    background: linear-gradient(135deg, #667eea 0%, #764ba2 100%);
    min-height: 100vh;
    margin: 0;
  }
</style>
Replace the colors with your brand colors. 135deg is a diagonal gradient. You can also use 180deg (top to bottom), 90deg (left to right), 0deg (bottom to top).
Radial gradient:
<style>
  body {
    background: radial-gradient(circle, #667eea 0%, #764ba2 100%);
    min-height: 100vh;
    margin: 0;
  }
</style>
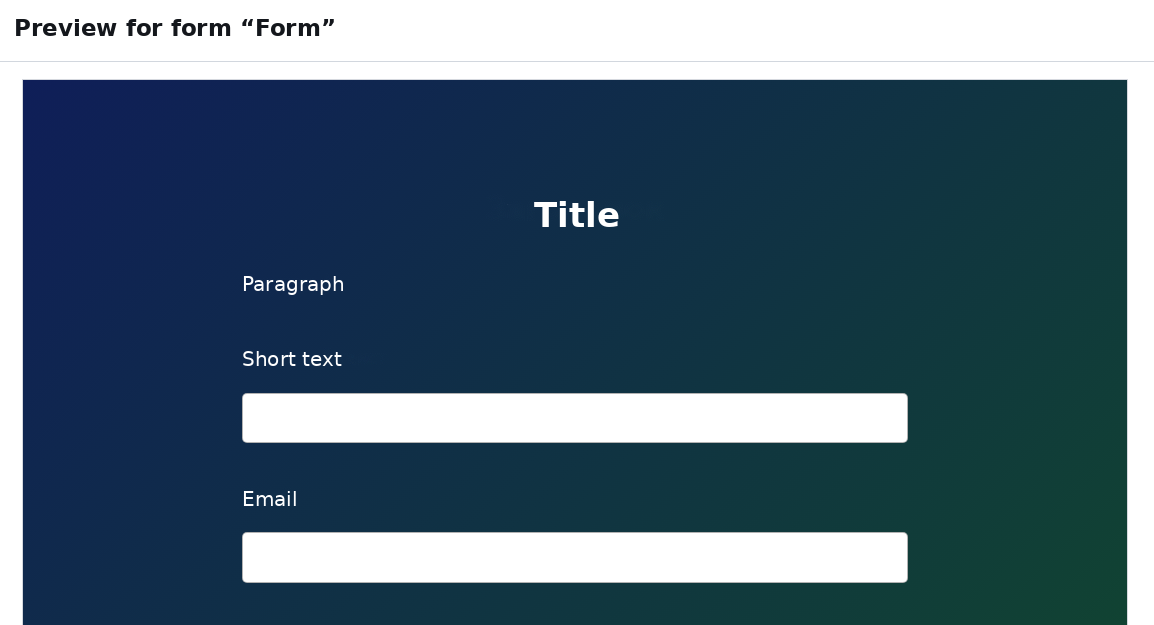
Image with gradient overlay
A semi-transparent gradient over an image improves readability:
<style>
  body {
    background:
      linear-gradient(180deg, rgba(102,126,234,0.7) 0%, rgba(118,75,162,0.7) 100%),
      url("https://example.com/background.jpg");
    background-size: cover;
    background-position: center;
    min-height: 100vh;
    margin: 0;
  }
</style>
The 0.7 value in rgba is the gradient opacity (from 0 to 1). Decrease it to make the image brighter; increase it to make the gradient more dominant.
Form card styling
The form card is the white block containing the fields. With custom code, you can add a shadow, border, change width, and adjust padding.
Shadow and border
<style>
  .form {
    box-shadow: 0 10px 40px rgba(0, 0, 0, 0.3);
    border: 2px solid rgba(255, 255, 255, 0.2);
  }
</style>
box-shadow— shadow (X offset, Y offset, blur, color)border— border (thickness, style, color)
Width and centering
<style>
  .form {
    max-width: 600px;
    margin: 40px auto;
    padding: 30px;
  }
</style>
max-width— maximum form widthmargin: 40px auto— top/bottom spacing and horizontal centeringpadding— inner padding
Rounded corners
<style>
  .form {
    border-radius: 16px;
  }
</style>
The Appearance tab has a "Element rounding" setting — it rounds fields and buttons inside the form. border-radius on .form rounds the card itself.
Full card example
<style>
  body {
    background: linear-gradient(135deg, #667eea 0%, #764ba2 100%);
    min-height: 100vh;
    margin: 0;
  }

  .form {
    box-shadow: 0 10px 40px rgba(0, 0, 0, 0.3);
    border: 2px solid rgba(255, 255, 255, 0.2);
    max-width: 600px;
    margin: 40px auto;
    padding: 30px;
    border-radius: 16px;
  }
</style>
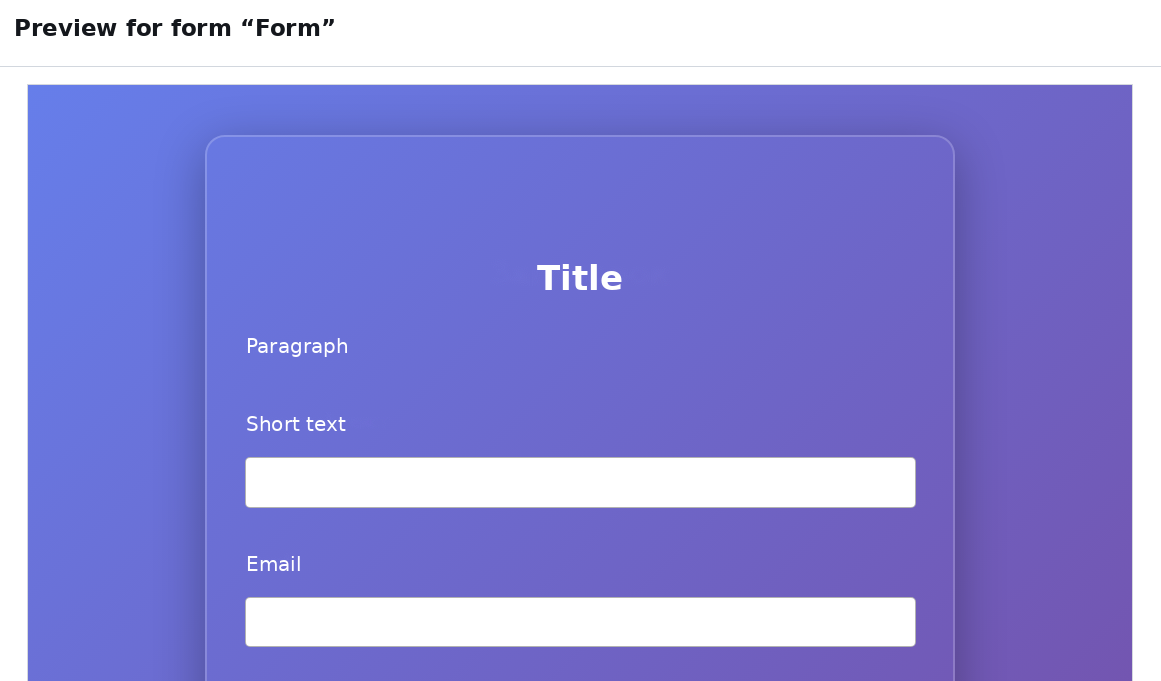
How to preview the result
After adding the code, click the preview button ![]() in the upper right corner:
in the upper right corner:

Changes are applied instantly. If something doesn't look right, go back to the General tab, edit the code, and open the preview again.
After publishing the form, changes may take up to 3 minutes to appear due to caching.
Recommendations
- Image links must be absolute and start with
https://. Relative paths do not work. - Always wrap CSS code in
<style>...</style>tags when inserting into the In the<head>tag area. - CSS rules take precedence over Appearance tab settings. If you set values in both places, the code will win.
- Test on mobile — switch to mobile view in the preview to make sure the logo and background display correctly on small screens.
- If the form is embedded on a website via iframe and you want the form background to be transparent (showing your page's background), add
body { background: transparent !important; }.