Managing scenarios
Elements (steps) of the scenario are described in a separate article.
Automation scenarios can be managed via API. Information is available at this link.
Scenario management
To start working with customer interaction scenarios, select Scenarios from the main menu. The list that opens displays brief information on existing scenarios, their activity statuses, and the number of profiles that are currently in the scenarios.

The context menu and the icons in the scenario row provide the following actions:
 — activate the scenario.
 — run the scenario now (if an activation schedule is set, you can force-run it before the scheduled time).
 — stop the scenario. If there are still profiles in the scenario at the moment of stopping, they can be saved. At the next scenario activation they will "wake up" and continue to go through the scenario from the element where they stopped.
 — send profiles to the scenario.
 — clear the scenario of profiles (the button next to the profile counter in the scenario row).
 — clone the scenario. When cloning, you can specify which version to copy: the published version, the draft, or another version.
— move the scenario to the trash (available only for inactive scenarios).
 — go to the scenario report.
Getting started with the scenario
To add a new scenario, click + Create at the top of the page.
Pre-setting
In the window that opens, enter the scenario name, select the database whose profiles will be captured, and the reentry mode. Then click Create.
The selected database cannot be changed after the scenario is created. The name and reentry mode can be changed later.
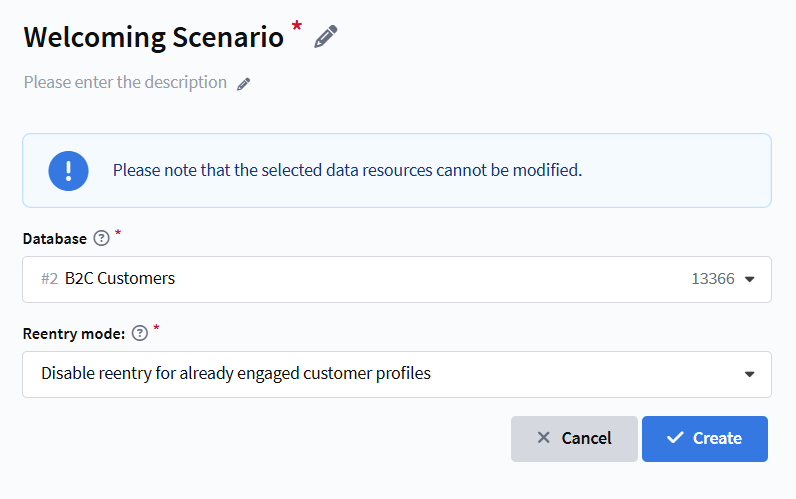
Re-entry mode defines the scenario behavior when a profile is captured multiple times:
-
Disable reentry for the customer profile — the profile enters the scenario only once. After exiting, reentry is not possible.
-
Disable reentry for already engaged customer profiles — if the profile is already in the scenario, reentry is not possible. After exiting — it can enter again.
-
Discard existent task for customer profile on reentry — the current task is terminated and replaced with a new one. All data (
apicontentand so on) is deleted, and the profile starts the scenario from the beginning. -
Process each profile entry in the scenario separately — the profile can re-enter the scenario; both runs are processed independently.
After creating the scenario, you are taken to the editor. In the About the Scenario section (button  ) you can set:
- description;
- tags;
- access groups;
- attributes (if a required attribute is activated for scenarios, select its value immediately);
- high priority;
- block trigger node entry;
- reentry mode.
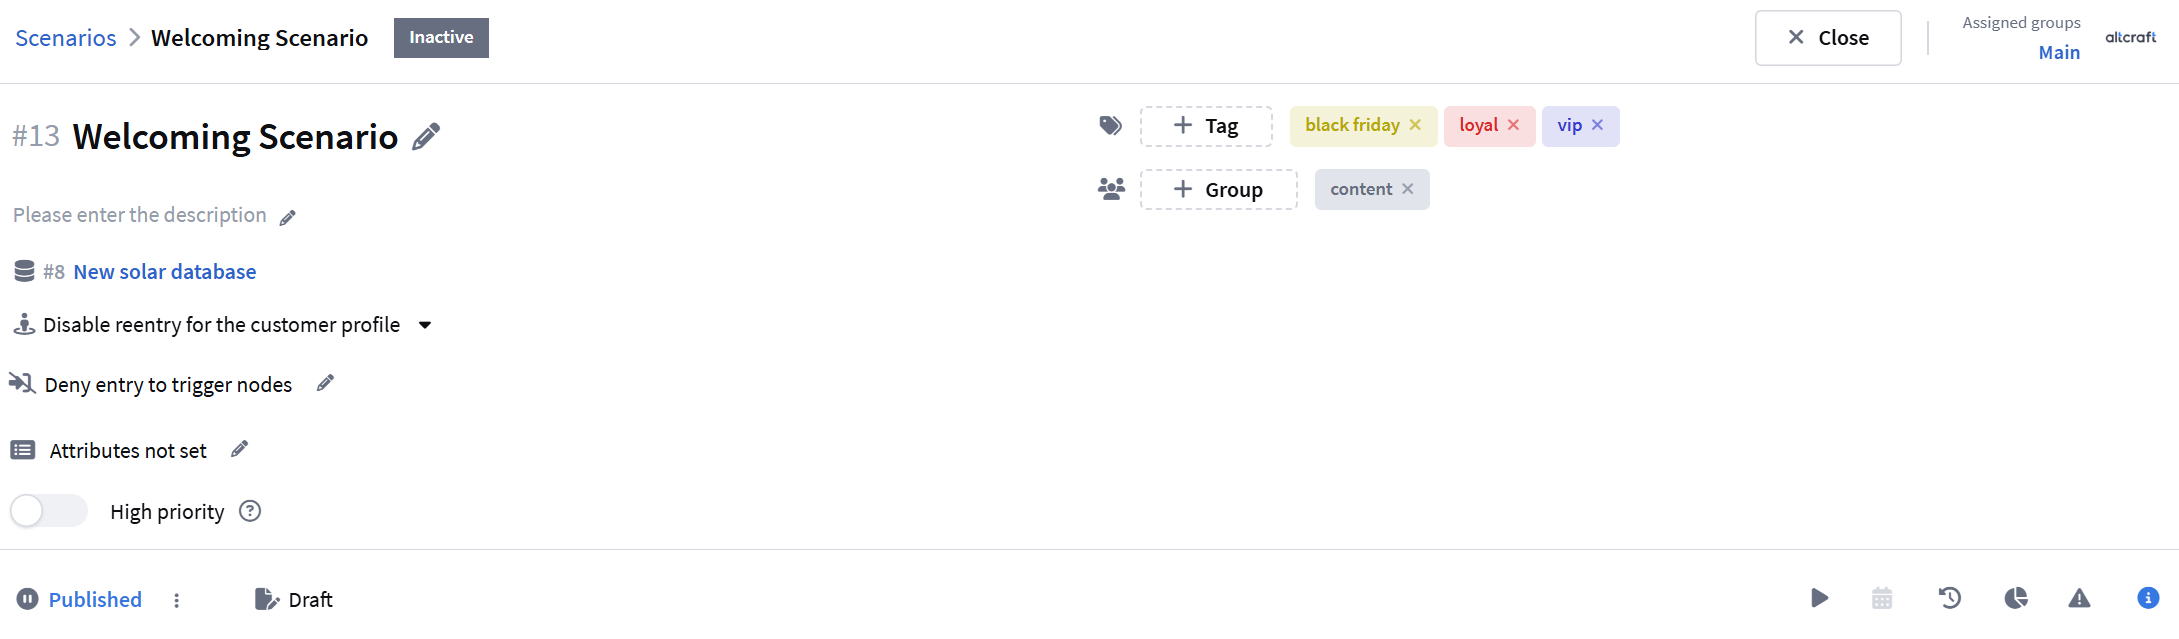
All changes in the editor are saved to the scenario draft. See Draft and scenario versions for details.
Configuring the capture of profiles to the scenario
The conditions for a profile to get into the scenario are determined by a trigger. A Trigger is a start element that starts the scenario. You can configure up to 10 triggers in one scenario.
To add a trigger, click Add Element and select the desired item from the Triggers category:
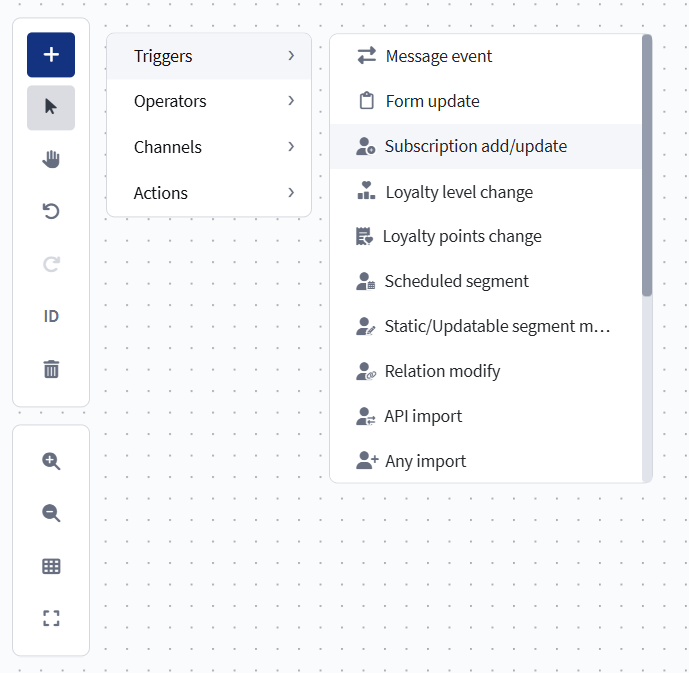
Detailed information on each trigger can be found in this article.
In order to save your scenario, you need to associate all start elements with any element.
Default profile capture
Any scenario has an element Default profile capture. This element is a built-in feature of the scenario and can't be removed. Double click on it to read the description.
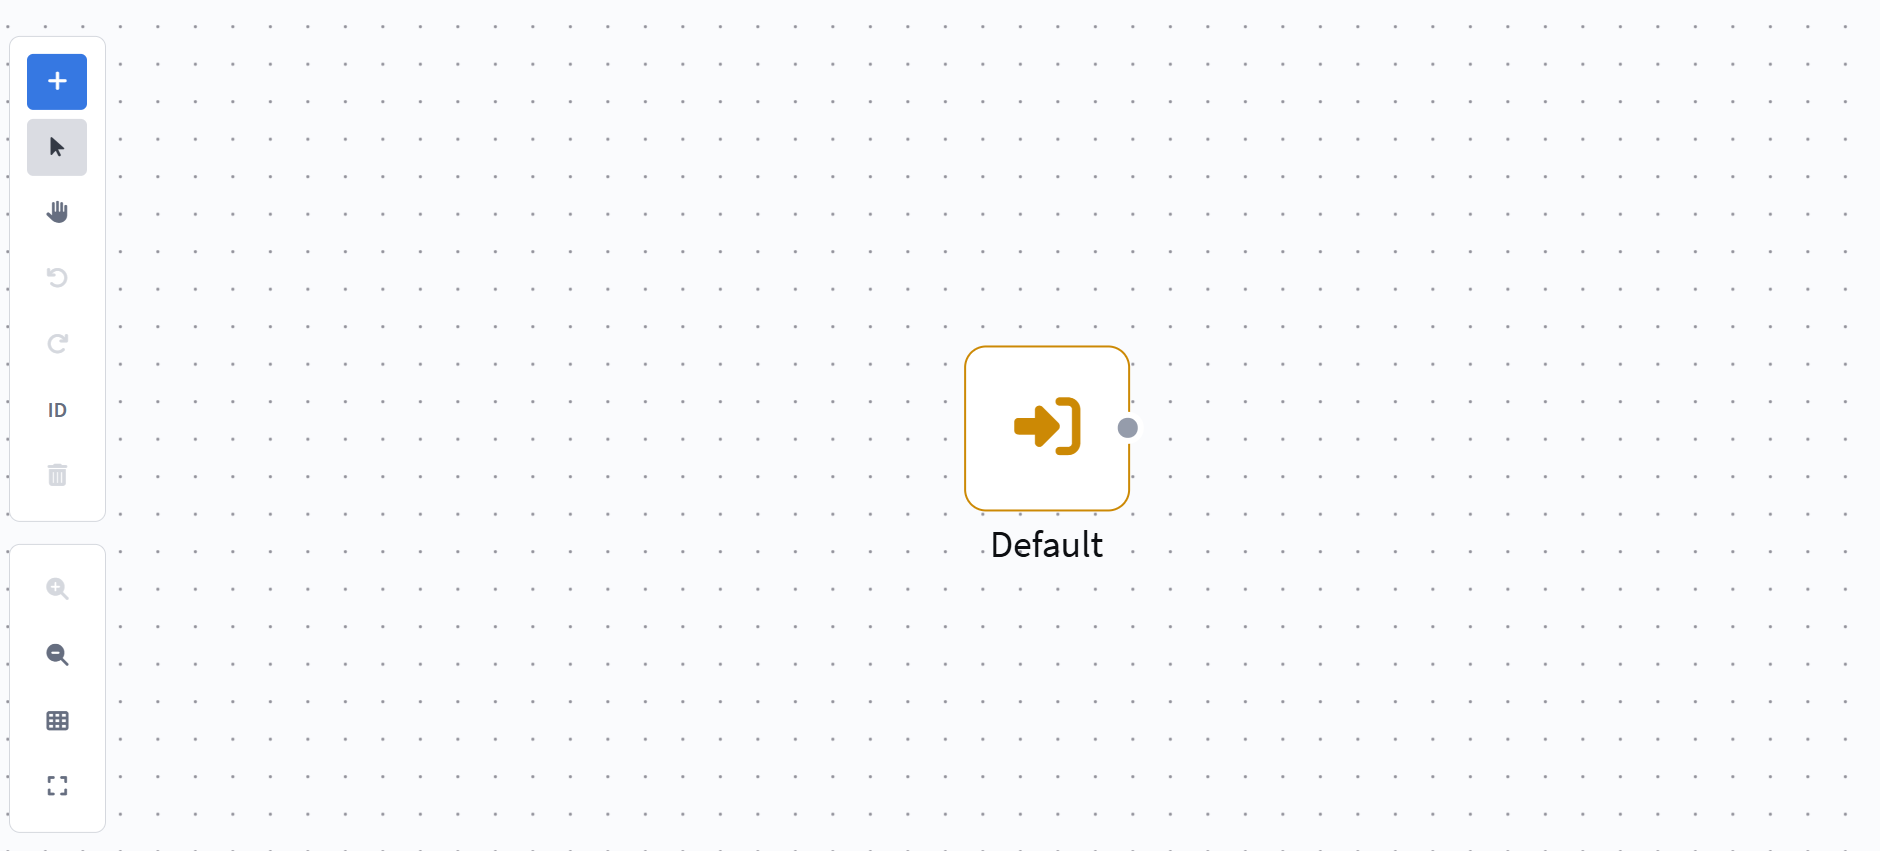
With the "Default" element, profiles can enter the scenario from different points in the platform:
1. When sending a profile to the scenario via API. When the scenario is saved, the item window will display a URL that can be used to run it. However, it is recommended to use a newer version of the API. See documentation for more information.
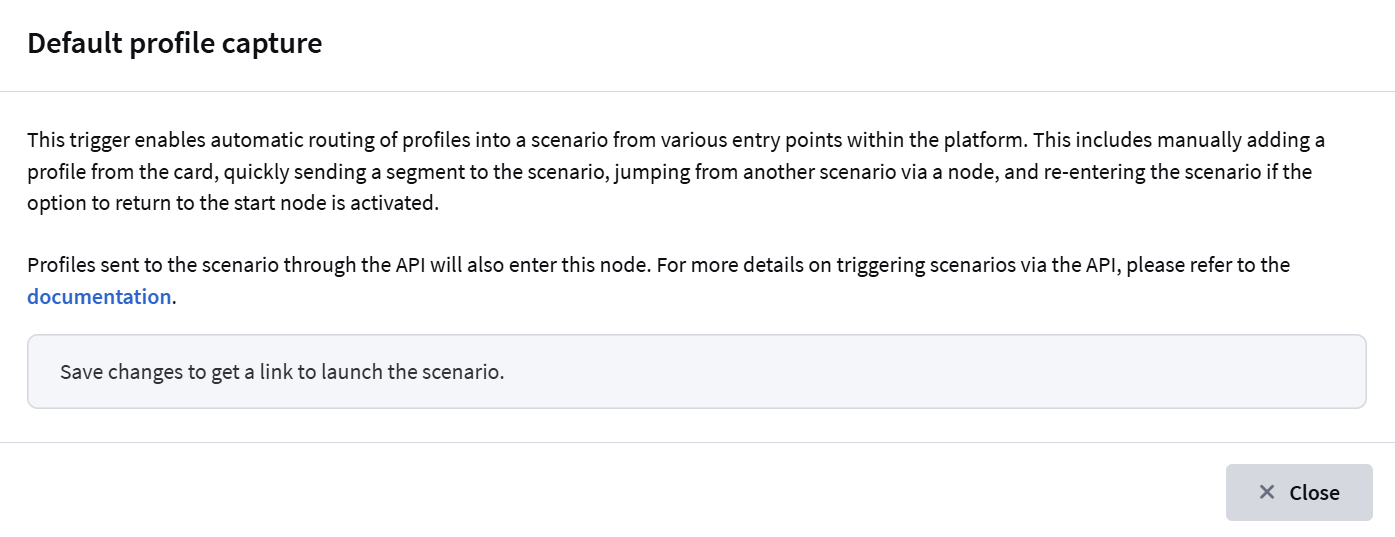
2. When adding a profile to a scenario manually:
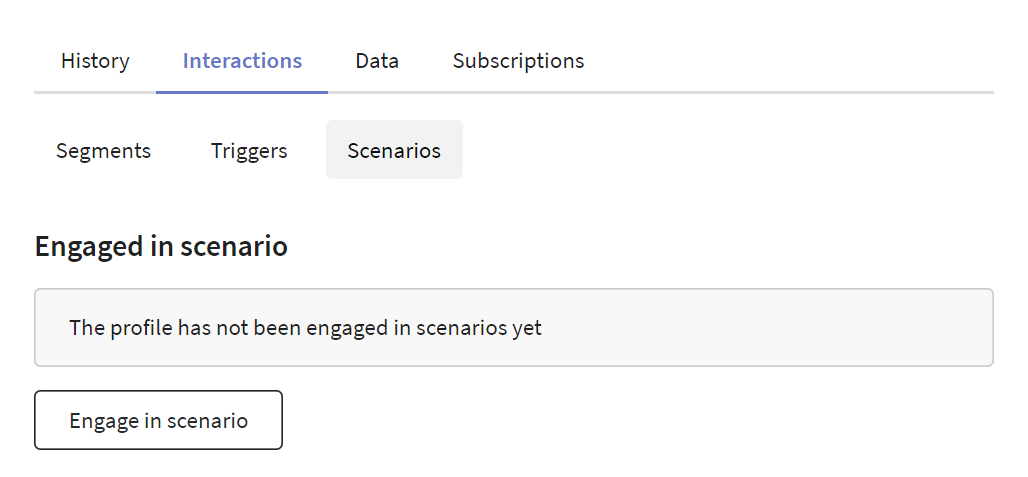
3. When sending the profiles engaged in one scenario to another scenario:

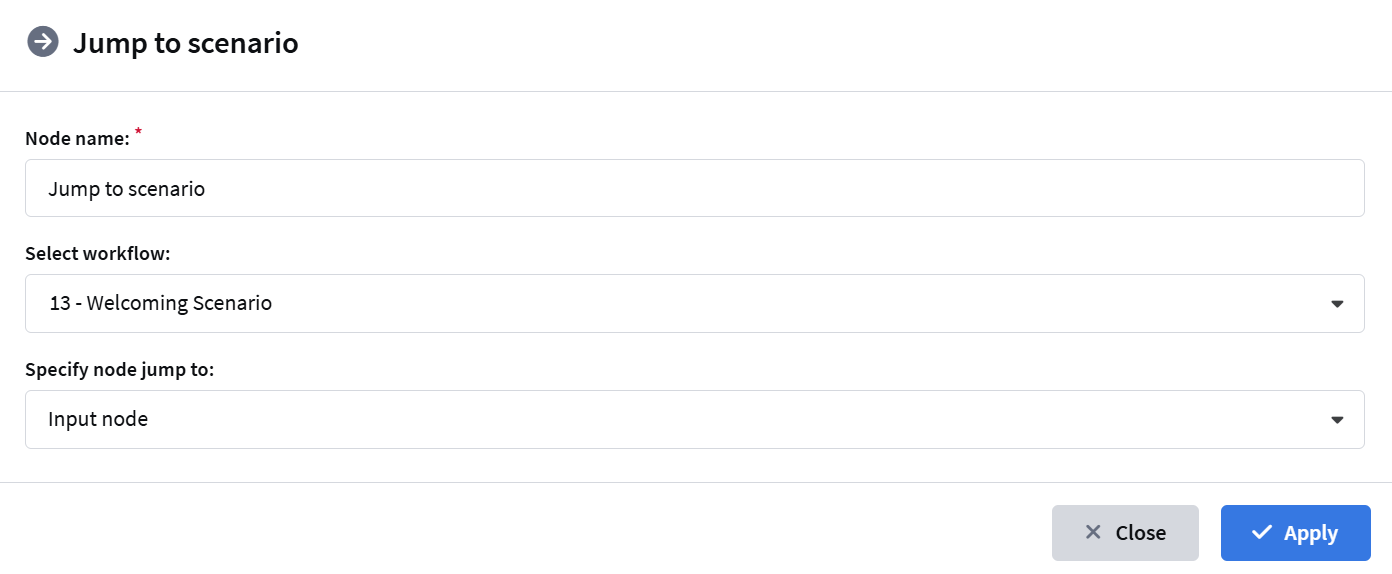
4. Via the "jump to scenario" node from another scenario:
Workflow Draft and Versions
Each scenario has a draft — a workspace for making changes without affecting the running version.
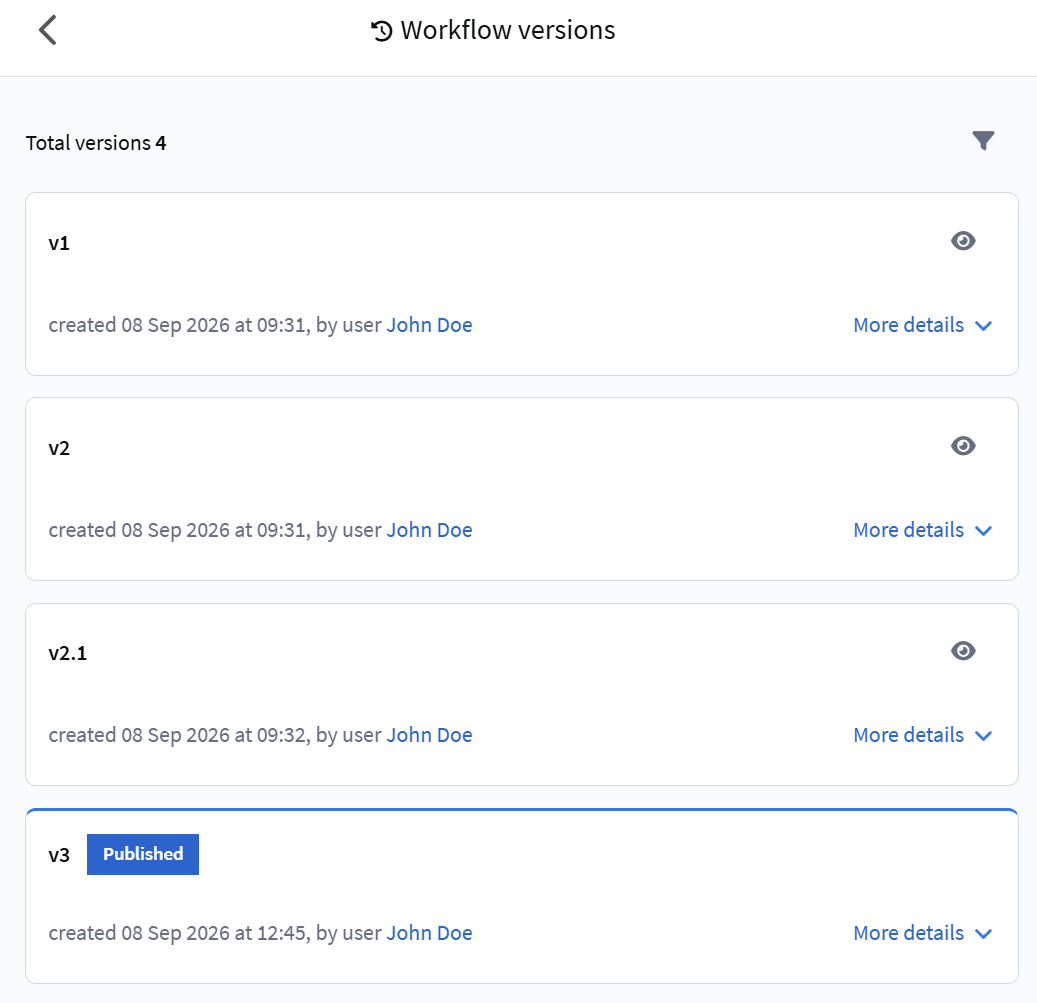
A version is an immutable snapshot of the scenario. A new version can be created from the draft or from any version in the list — for example, edit an old one and save it as a new version.
Only one version can be published — this version will be used when the scenario is activated.
Workflow Draft
A draft is a copy of the workflow where you can freely add, remove, and modify nodes without affecting the running version.
Changes to the draft do not affect the running version. If you close the editor without clicking Save, your changes are saved, but only for your account — other users will not see them. The Save button makes the draft shared: after this, all users with access to the scenario can see it.
Unlike publishing and saving as a version, saving a draft does not run an error check. This allows you to:
- save intermediate work;
- return to workflow configuration later;
- add nodes without ready-made templates for communications.
If another user saved the draft while you were working on your copy, the system will show a dialog:
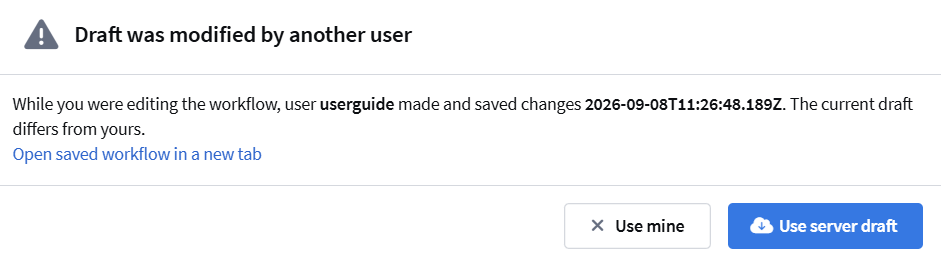
- Use server — overwrite your draft with the server version;
- Use mine — save your copy;
- Open the saved scenario in a new tab — to compare versions.
The conflict window also appears when saving if another user saved the draft while you were working:
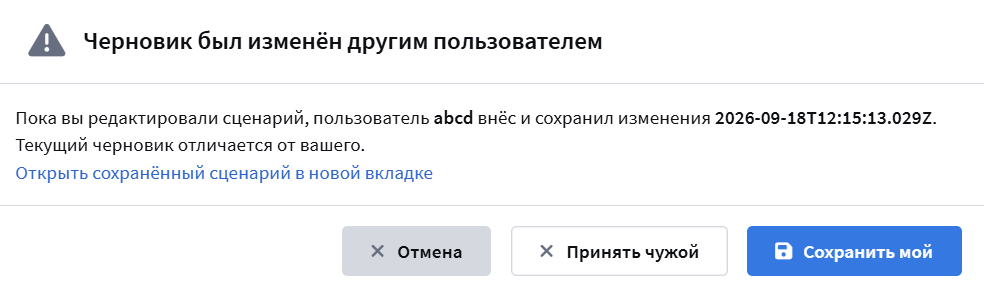
- Save mine — save your copy, overwriting the server version;
- Accept theirs — use the server version of the draft;
- Cancel — cancel the save.
Saving and Publishing
The draft panel provides the following buttons:
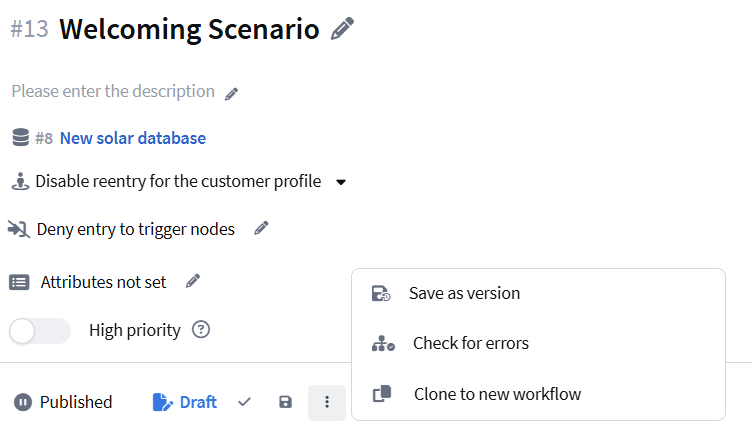
- Save — changes are written to the draft without publishing. The running version of the workflow does not change, and no error check is performed.
- Publish — opens the "Publish Version" modal dialog. The draft is published as a new workflow version. Before publishing, the system checks the workflow for errors: all nodes must be correctly configured, campaigns must have templates, and resources must be connected. If errors are found, the publish will not proceed.
Other actions are available in the menu (the ⋮ button on the panel):
- Save as Version — creates a new version from the draft. An error check is performed before saving. The current draft is overwritten.
- Check for errors — runs an error check on the workflow configuration.
- Clone to new workflow — creates a copy of the workflow from the open draft or version.
Publish dialog
When publishing a version, you can configure:
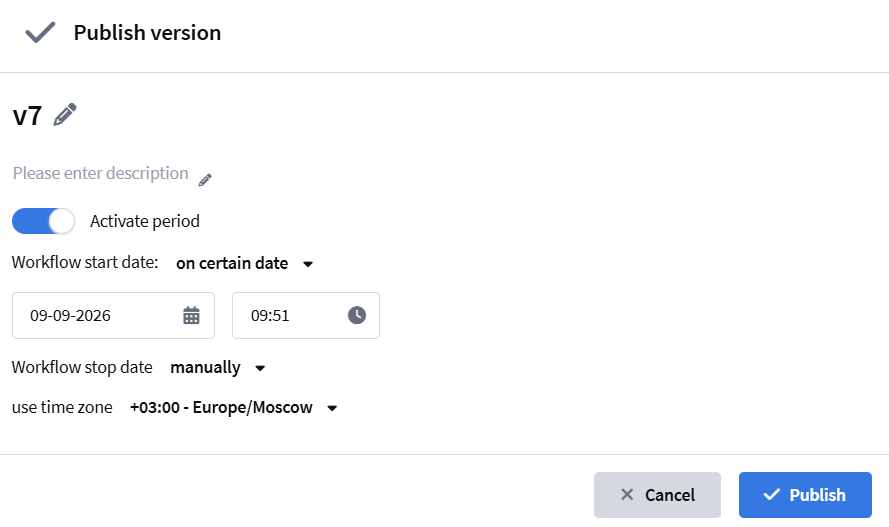
- Version name — by default, the publication date and time;
- Version description — a brief description of the changes;
- Clear profiles — if the workflow has profiles, a clear option appears;
- Activate upon publication — the workflow will start immediately after publication;
- Activation period — start date, deactivation date, and time zone.
If the scenario is active, publishing a new version keeps the scenario running on it.
Workflow Versions
Every time you publish a draft or save it as a version, a new version is created: the complete set of nodes, connections, and settings at the moment of publishing or saving.
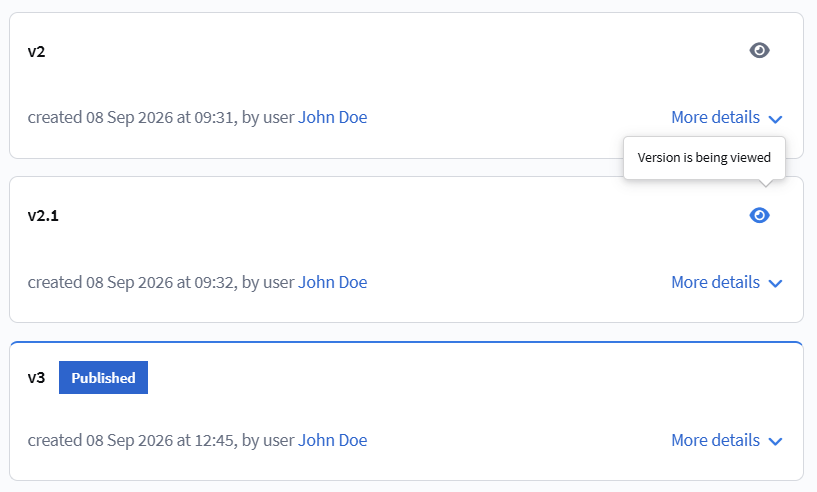
Versions are displayed in the editor's sidebar. The published version is marked as "Published".
The system stores up to 100 versions of a workflow. When the limit is reached, the system asks for confirmation before saving a new version — the oldest unpublished version will be deleted.
Viewing a Version
To view a version, click  next to the desired version. The viewed version is marked as "Version is being viewed".
The selected version opens in the view window:
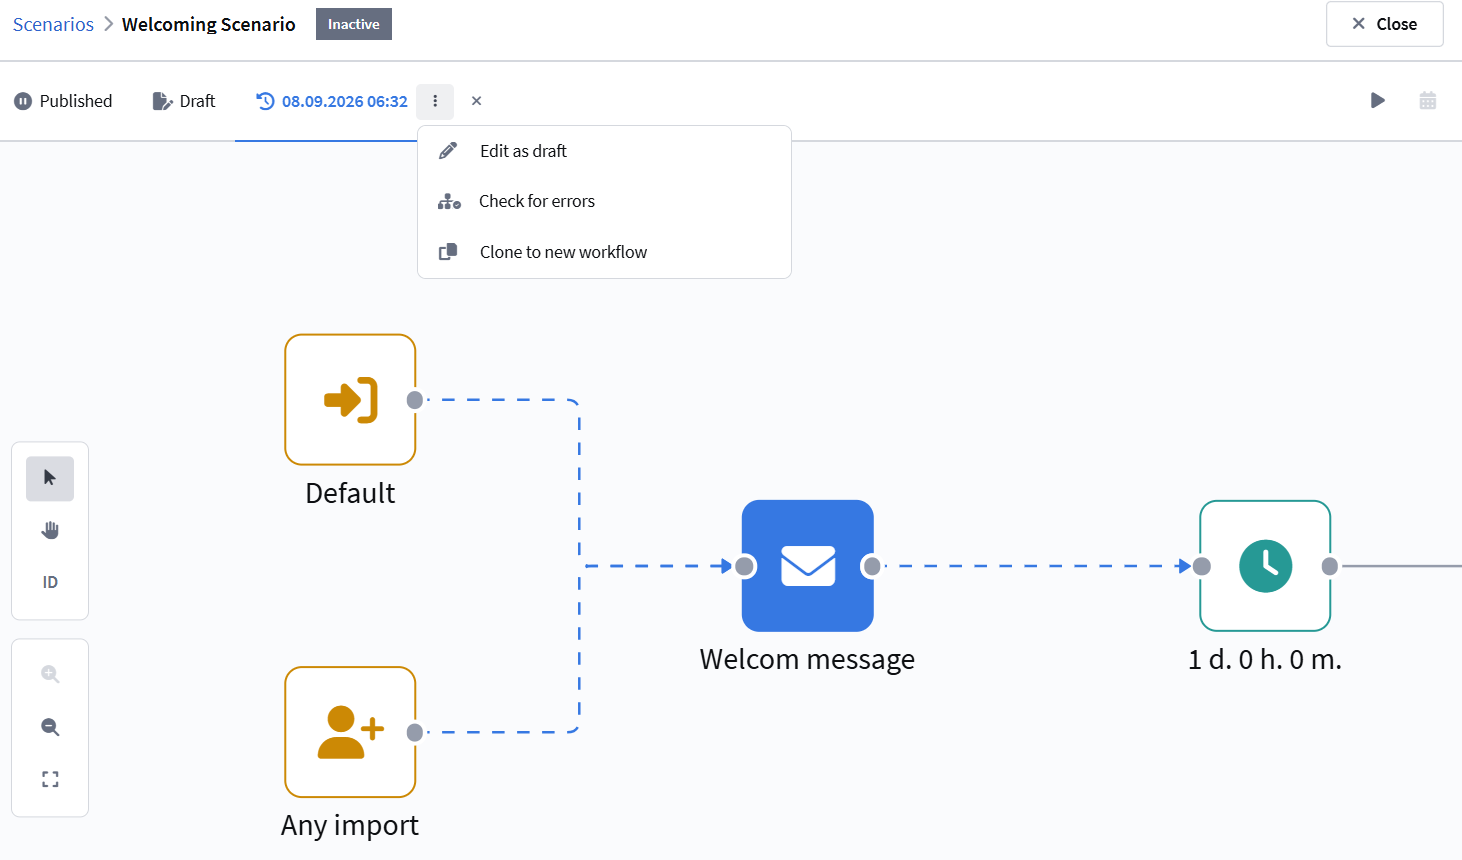
From the menu (the ⋮ button on the panel) you can:
- Edit as draft — the version is copied to the draft (the current draft is overwritten). Further changes are made in the draft;
- Check for errors — runs an error check;
- Clone to new scenario — creates a copy of this version in a new scenario.
Switching Version
To make another version active:
- Open the version you want from the list;
- Select "Edit as draft" — the version is copied to the draft;
- Publish the draft.
After publishing, the selected version becomes published and the previous one — unpublished. If the scenario is running, it continues on the new version.
Activating and deactivating a scenario
Workflow Statuses
A workflow can be in one of three statuses:
- Active — the workflow is running and capturing profiles;
- Inactive — the workflow is stopped;
- Pending — the workflow is scheduled and waiting for the active period to begin.
Activation
Only a published version of the workflow can be activated. Only one version can be published at a time. If the workflow has no published versions, activation is unavailable — first publish the draft (see Workflow Draft and Versions).
To activate the workflow, click  on the editor toolbar.

In the activation dialog, you can set the active period — the workflow start and end dates:
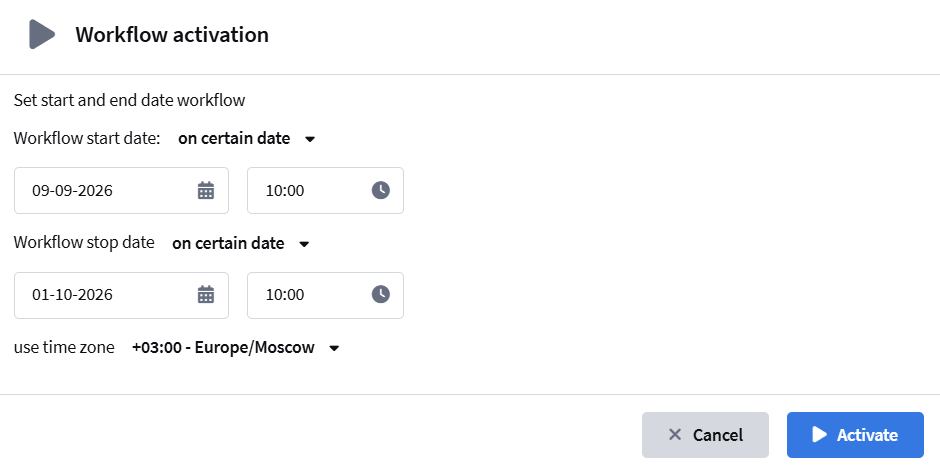
- Scenario start date — the scenario starts capturing profiles from the specified date and time. Until then, the scenario is in "Pending" status. You can choose: on a specific date or now;
- Scenario deactivation date — the scenario is deactivated after the specified period (manually — no automatic deactivation);
- Use time zone — time is interpreted in the specified time zone;
- Clear the workflow before reactivation — when enabled, frozen profiles are removed from the workflow before activation. This option is displayed if there are profiles in the workflow.
Deactivation
Click  and save the scenario. If there are profiles in the workflow, a deactivation dialog opens with the Keep profiles in the workflow that will wake up when it is activated option:
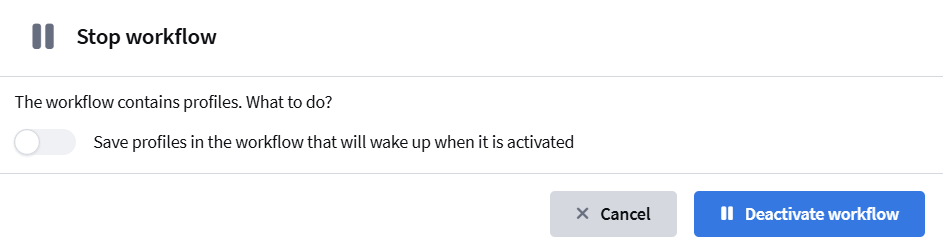
By default, after deactivation all profiles exit the scenario. To prevent this, enable the option — profiles will be frozen and will continue after reactivation.
Deactivating a scenario stops capturing new profiles through all triggers. If you need to stop only the intake of new profiles through a specific trigger without stopping the scenario, use the Block Trigger Node Entry function — More details.
You can also activate and deactivate a scenario from the general list:

Blocking Individual Triggers
The Block Trigger Node Entry function lets you stop new profiles from entering through a specific trigger without stopping the whole workflow.
For example, profiles enter the workflow through two trigger nodes: "Form submission" and "API import". If you disable entry through the "Form submission" trigger, profiles arriving via "API import" will continue to enter the workflow, while those who submitted the form will not. After you remove the restriction, only profiles who submit the form after the restriction is removed will enter the workflow through this trigger; those who submitted the form during the restriction will not enter the workflow.
To block a trigger:
- Open the About the Scenario block;
- In the Block Trigger Node Entry field, select the node(s) where entry is forbidden.
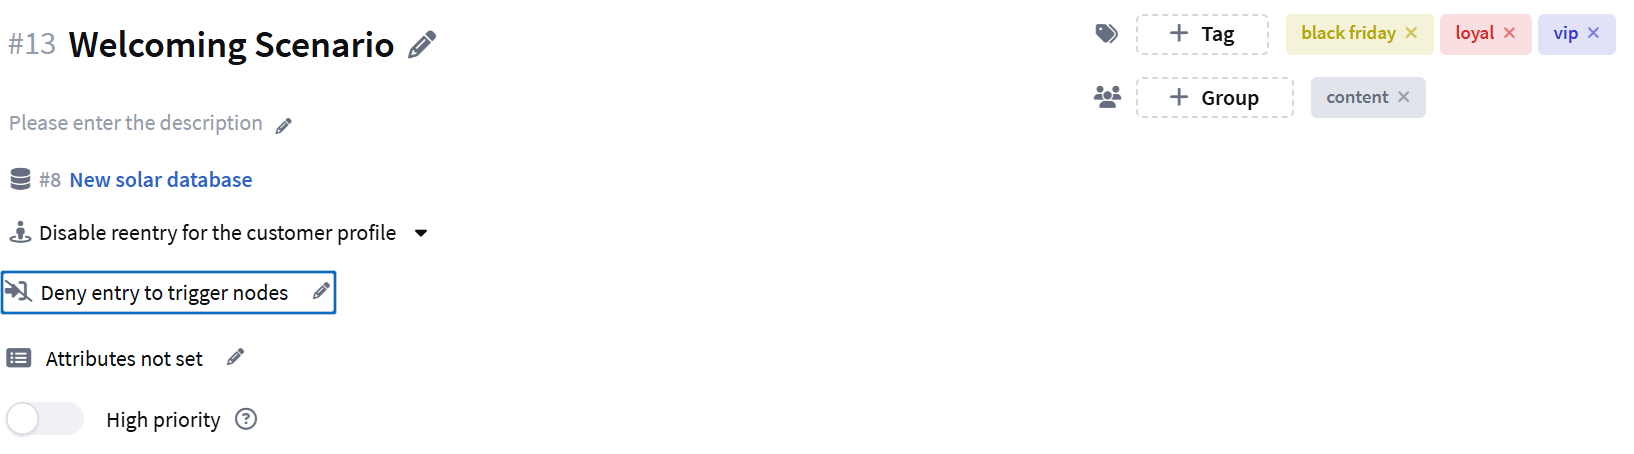
A blocked trigger is marked in the editor. The block affects entry only — profiles already in the workflow continue processing.
Scenario analytics
You can analyze the effectiveness of your scenarios directly in the scenario editor, and you can see detailed statistics on the mailings used in the chain in the channel report.
Client Scenario Completion Statistics
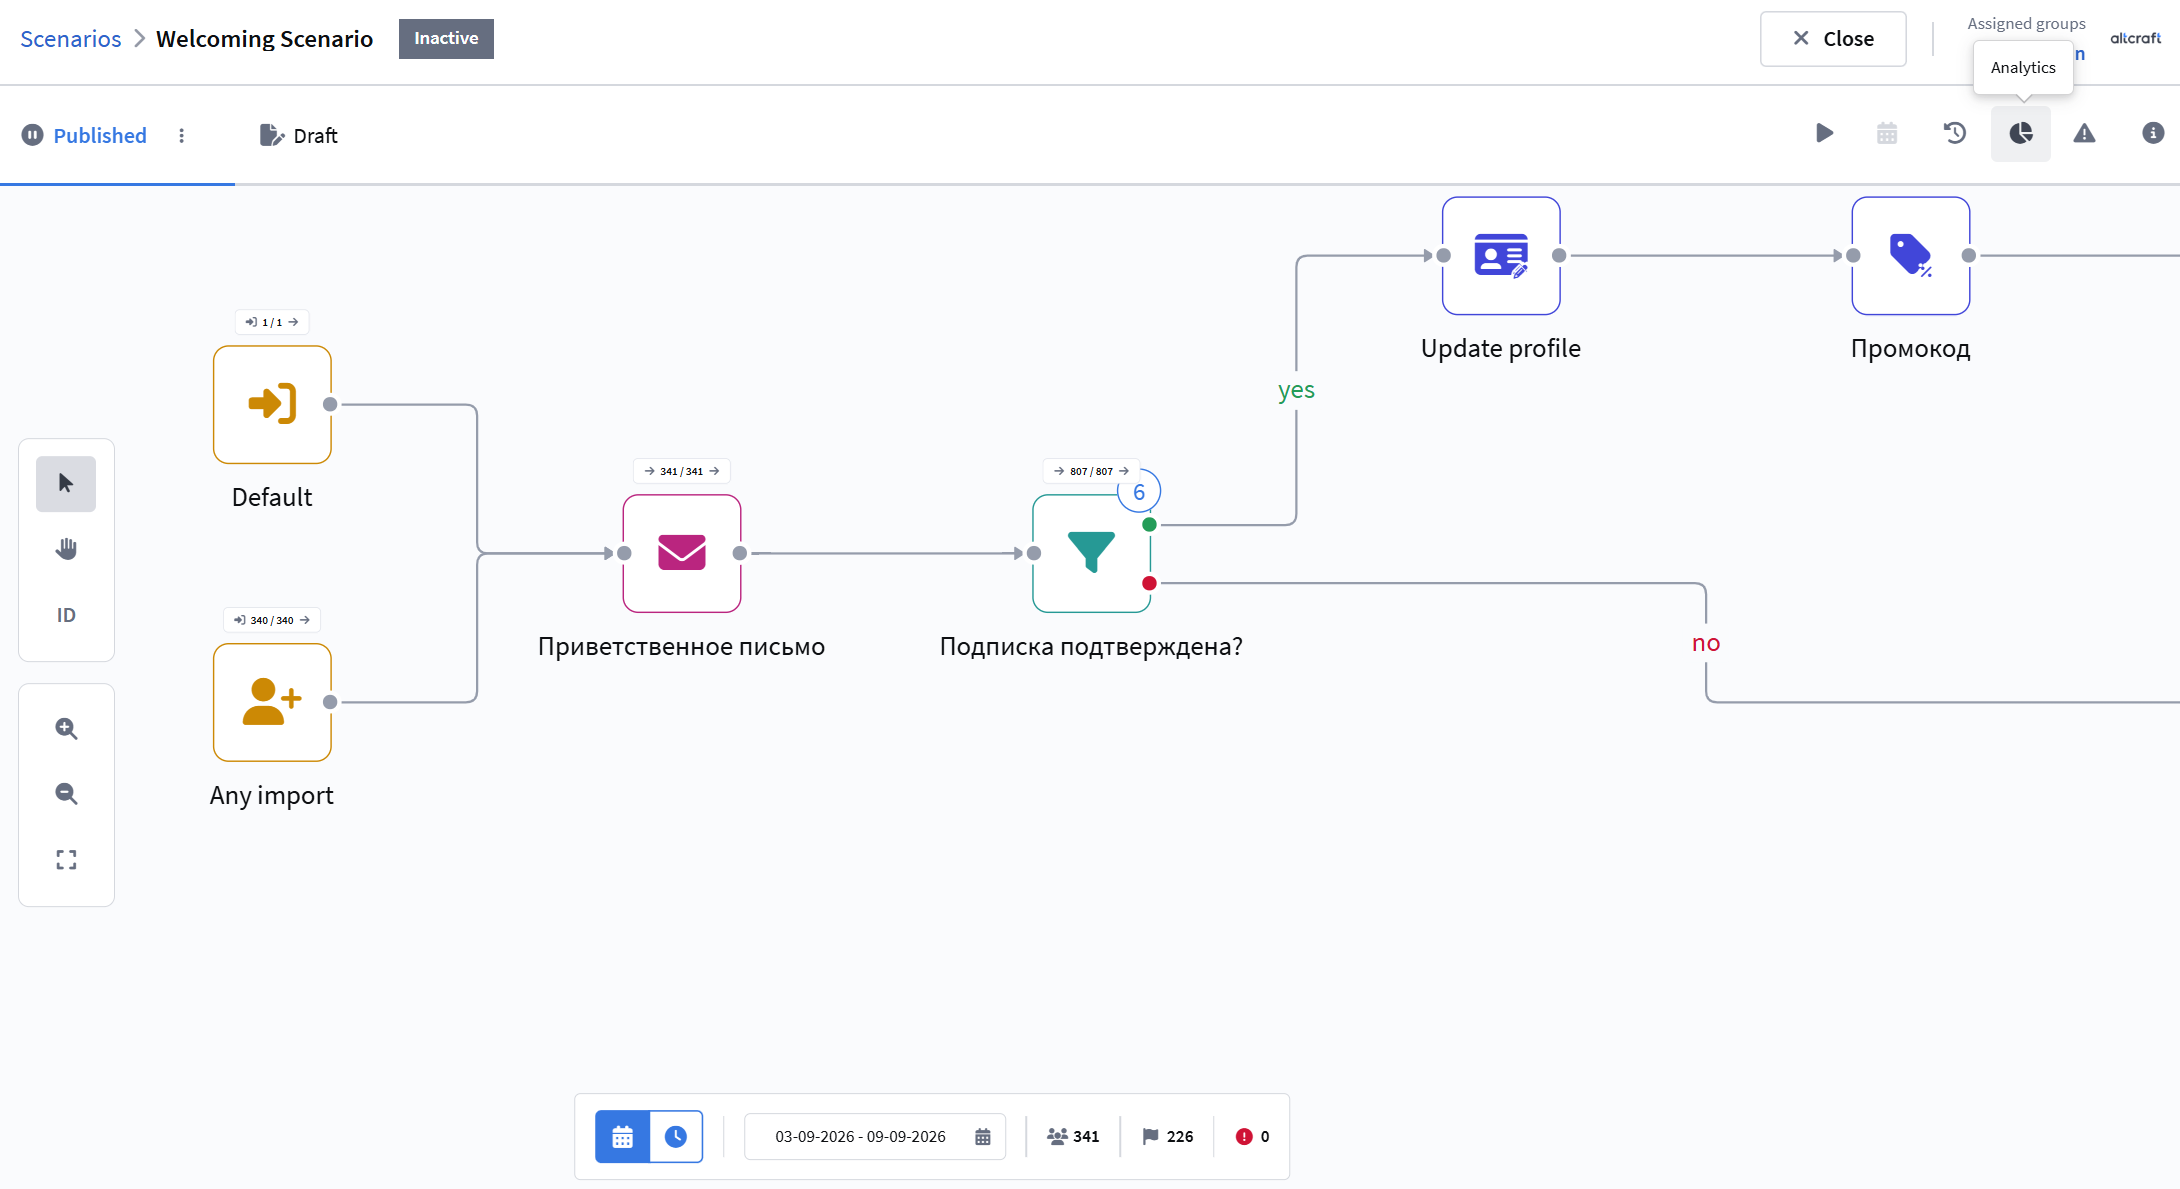
The statistics panel is located at the bottom of the editor. This panel contains information about completion of the scenario by profiles.
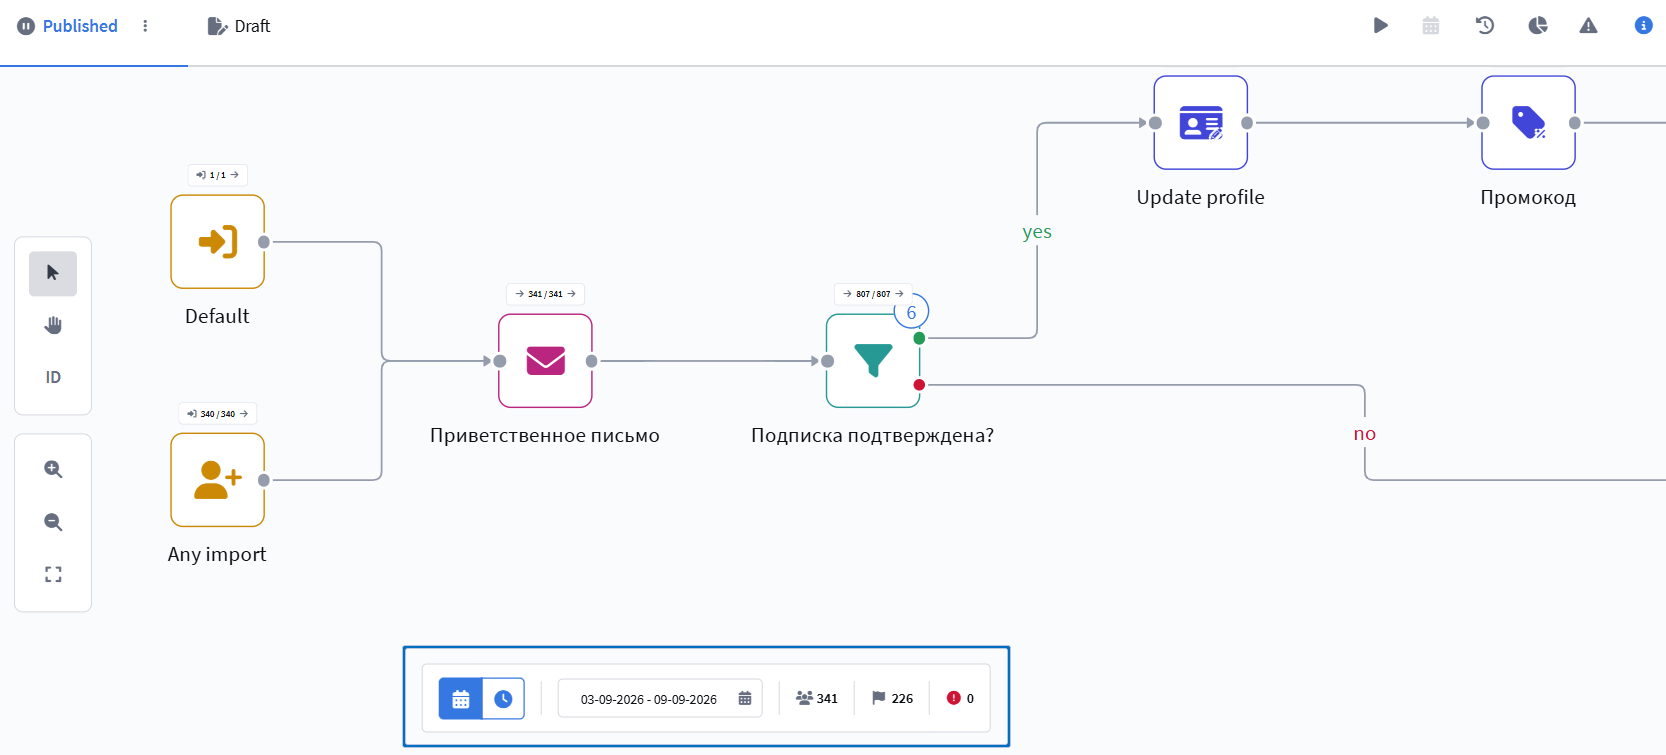
Viewing statistics is available in two modes:
 — period statistics
 — real time statistics
period statistics
Here you can view scenario data for a specific time period:
 — total number of profiles that entered the scenario.
 — number of profiles that have completed the scenario.
 — errors that occurred during the scenario process.
By default, the panel displays data for the last 7 days. To change the period, enter the desired dates manually or select them from the calendar:
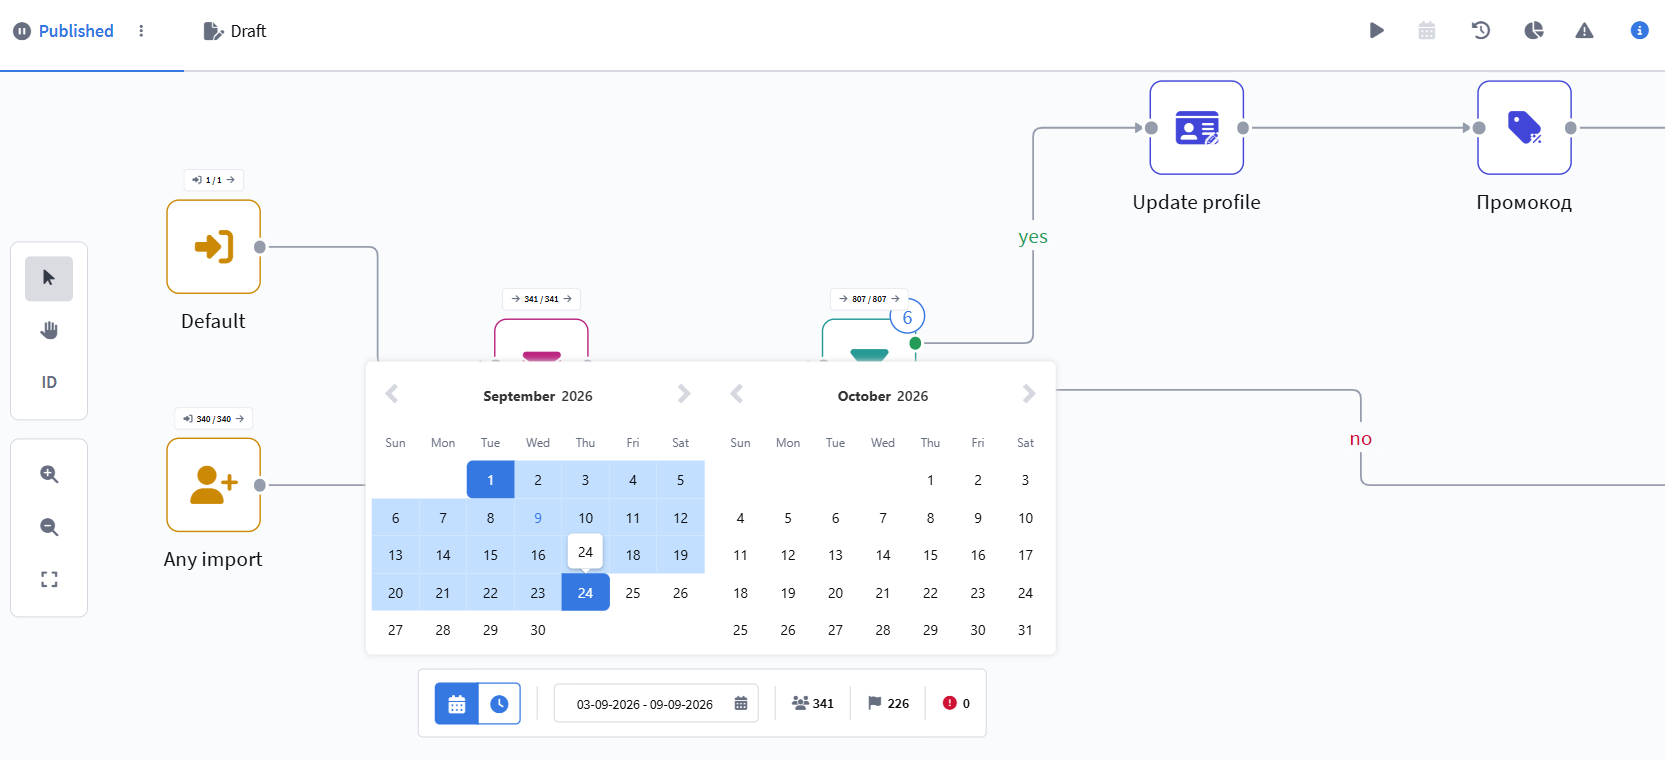
Also above each scenario element it is shown how many profiles entered the element and how many exited.
Real-time statistics
Here you can get information about the profiles that are currently in the scenario.
— the number of profiles that entered the scenario but have not yet completed it.
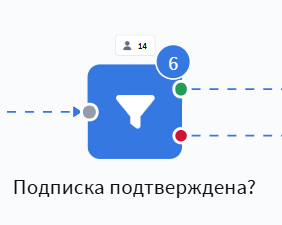
Above the elements where profiles are located, their count is displayed. Usually these are waiting elements (Pause, Best Delivery Time, Delayed Condition).
Click the number to:
- go to the client's profile in the database;
- find out the exact time when the profile will leave the element;
- download a file with API content, if the corresponding parameter was passed in the API-request.
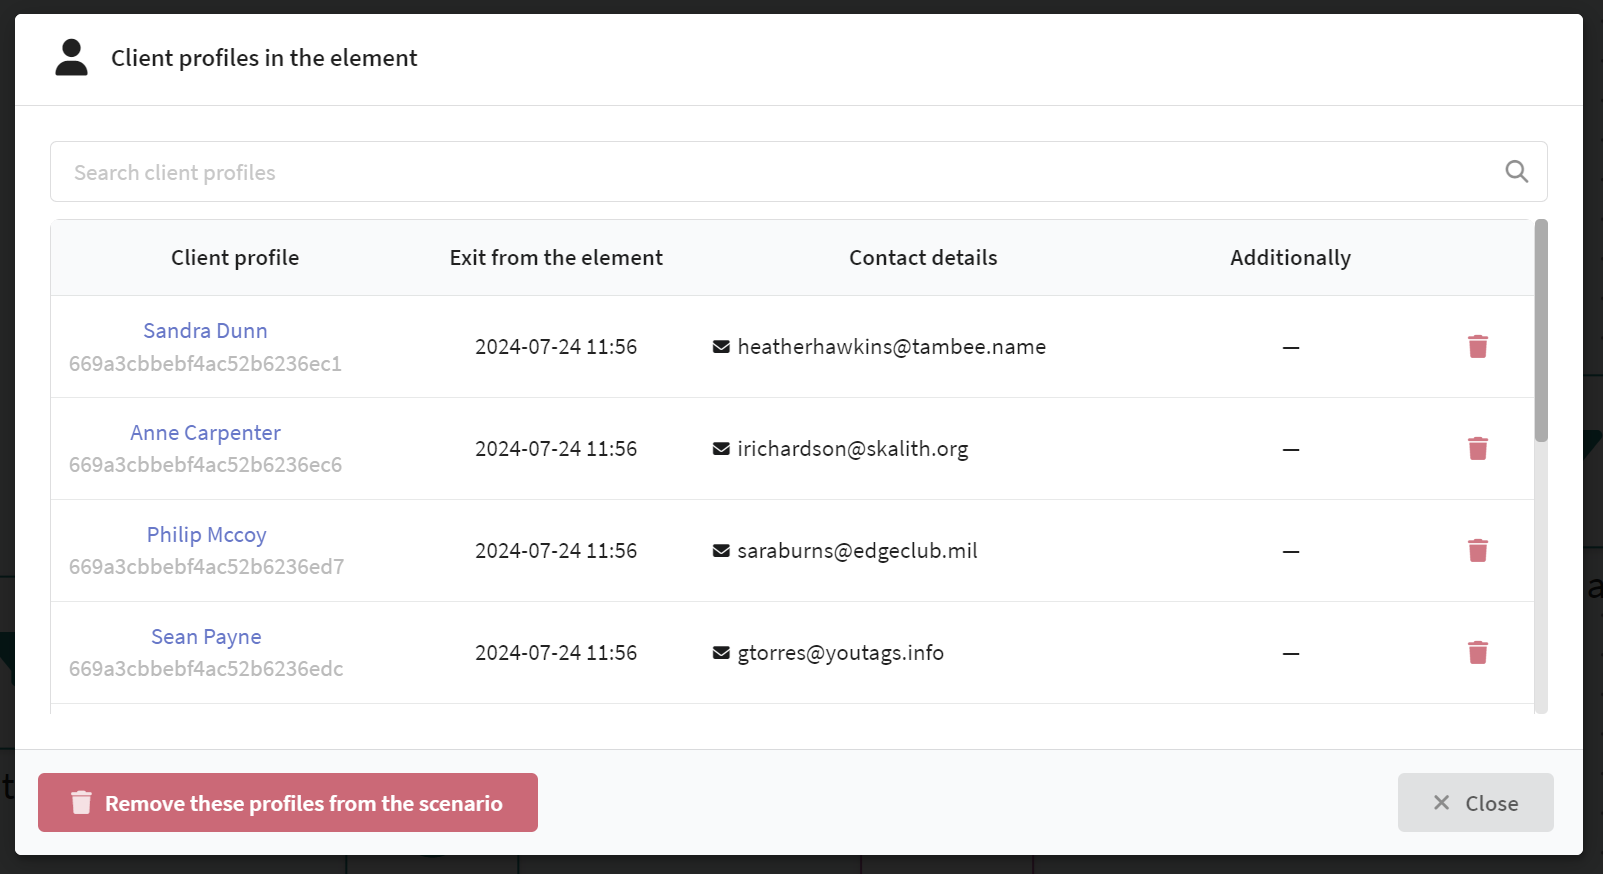
It is also available to delete profiles from the scenario. If you want to delete a specific profile from the scenario, click on the trash can icon next to its name:
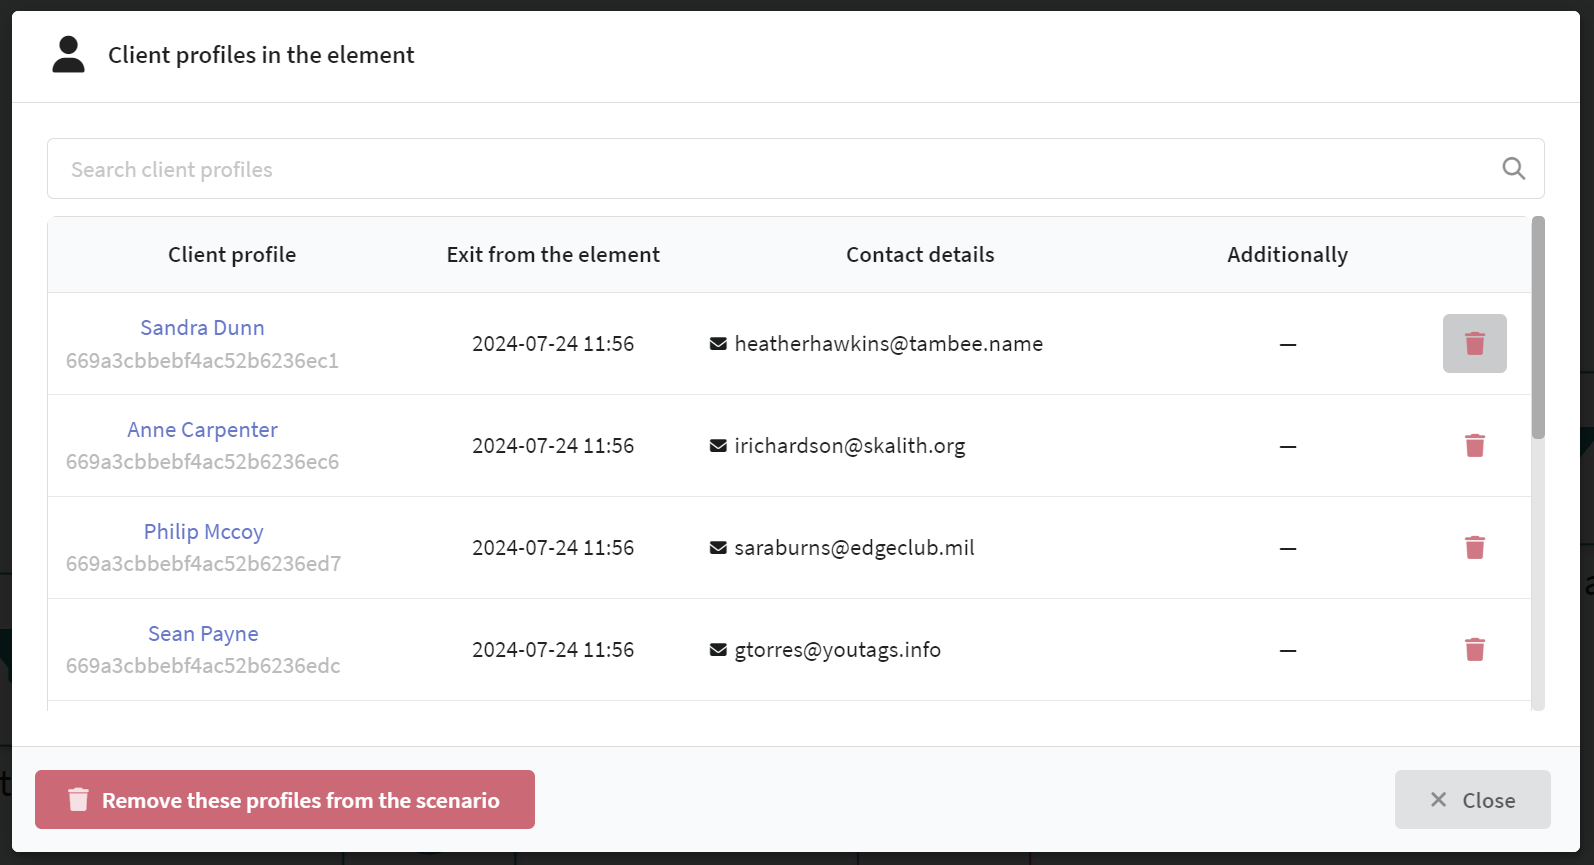
To remove from the scenario all profiles that are currently in this element, click Remove these profiles from the scenario.
Advanced Node Statistics
For each workflow node, detailed statistics are available:
- Entries — number of profiles that entered the node;
- Exits — number of profiles that successfully passed through the node;
- Errors — number of profiles that completed node processing with an error.
The difference between inputs and outputs shows how many profiles did not pass the node. Error reasons can be seen in the Error Manager.
Error Manager
The Error Manager shows profiles that could not pass through workflow nodes due to errors. Open it via the ⚠ icon on the editor toolbar.
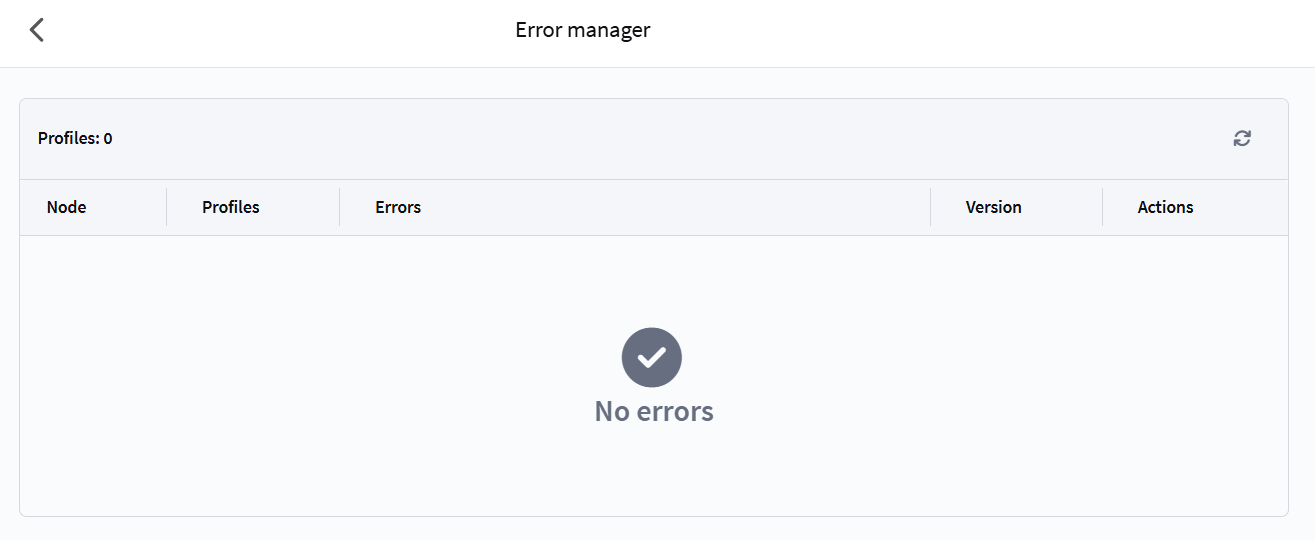
This is a unified block covering all published versions where profile errors occurred. For each error group, the following are displayed:
- Node — the name and ID of the node where the error occurred;
- Profiles — the number of stuck profiles;
- Errors — description of the cause (e.g., "Template unavailable", "Node deleted");
- Version — the workflow version where the error was recorded. You can open the version tab by name;
- Actions — available actions for each profile.
If there are no errors, the message "No errors found" is displayed.
Actions for profiles in errors
The following actions are available for each error group:
- Transfer to node — the profile is moved to the specified node in the current published version;
- Exit workflow — the profile completes the workflow;
- Retry — the system re-sends the profiles to the same node and retries processing. This button is only available for the published version and only if the node exists in it.
While a profile is in the error status, it cannot re-enter the workflow.
Schedule Run Metrics
For start nodes with a schedule, run history is available:
- start and end dates of the run;
- run status (success, error, pending);
- number of captured profiles;
- error text and error count (in case of failure).
This shows when the trigger last ran and whether there were capture errors.
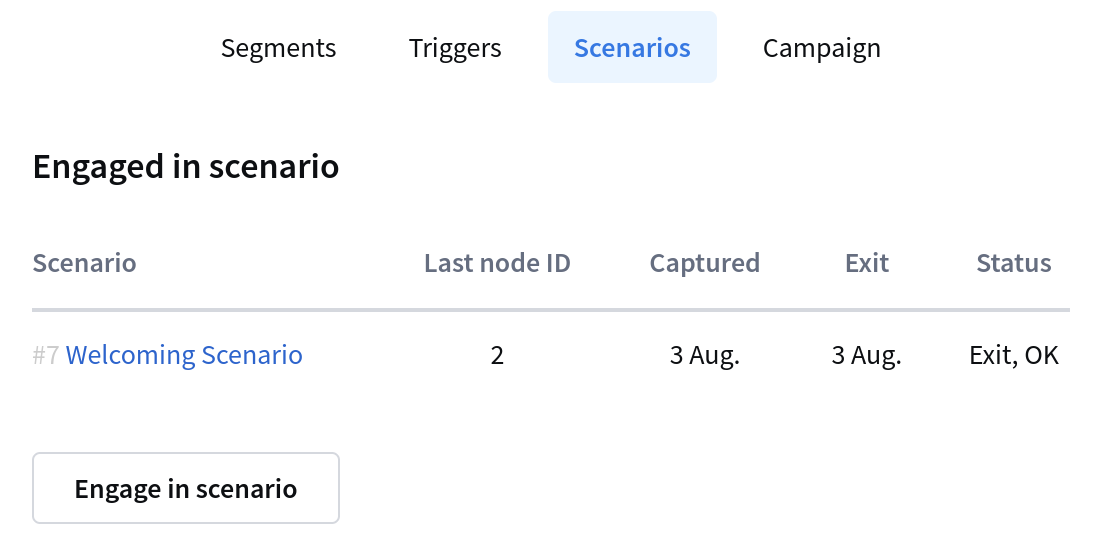
To find out on which element the profile left the scenario, open the profile card, go to the Interactions —> Scenarios tab and hover over the "Exit" stat. The item ID will be displayed:
Mailing analytics in the scenario
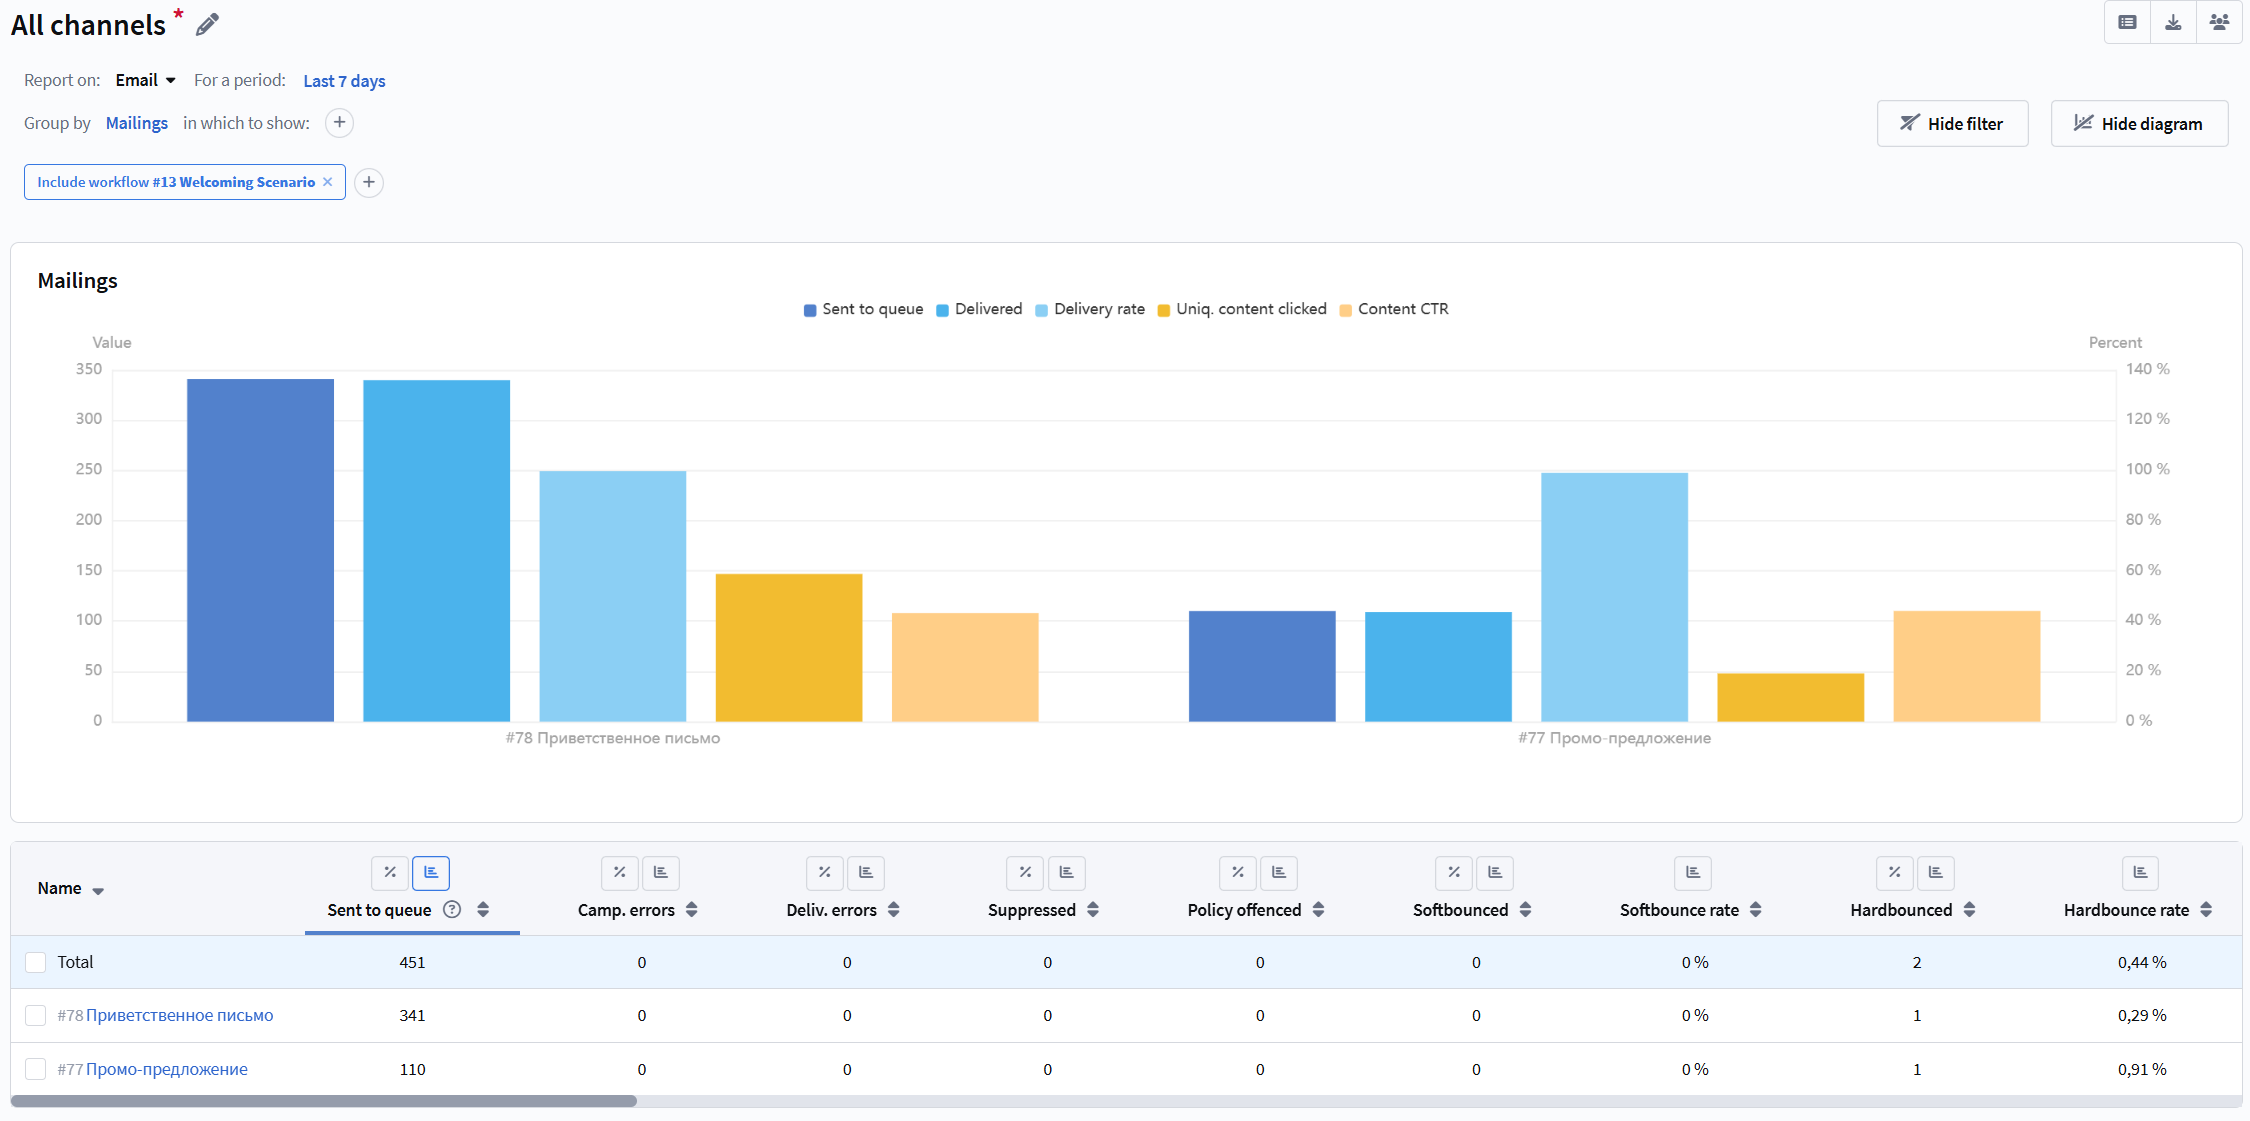
To view a report of the mailings that the scenario runs, open Channel Report:
Use groupings and filters to display the data you need. For example, if you want to see the statistics of the mailings involved in a scenario, you can use this setting: