Working with Campaigns
Description
Previously, all types of marketing Messages in the platform were called Campaigns. In the new platform version they have been renamed to Messages, while the new Campaigns represent a broader tool.
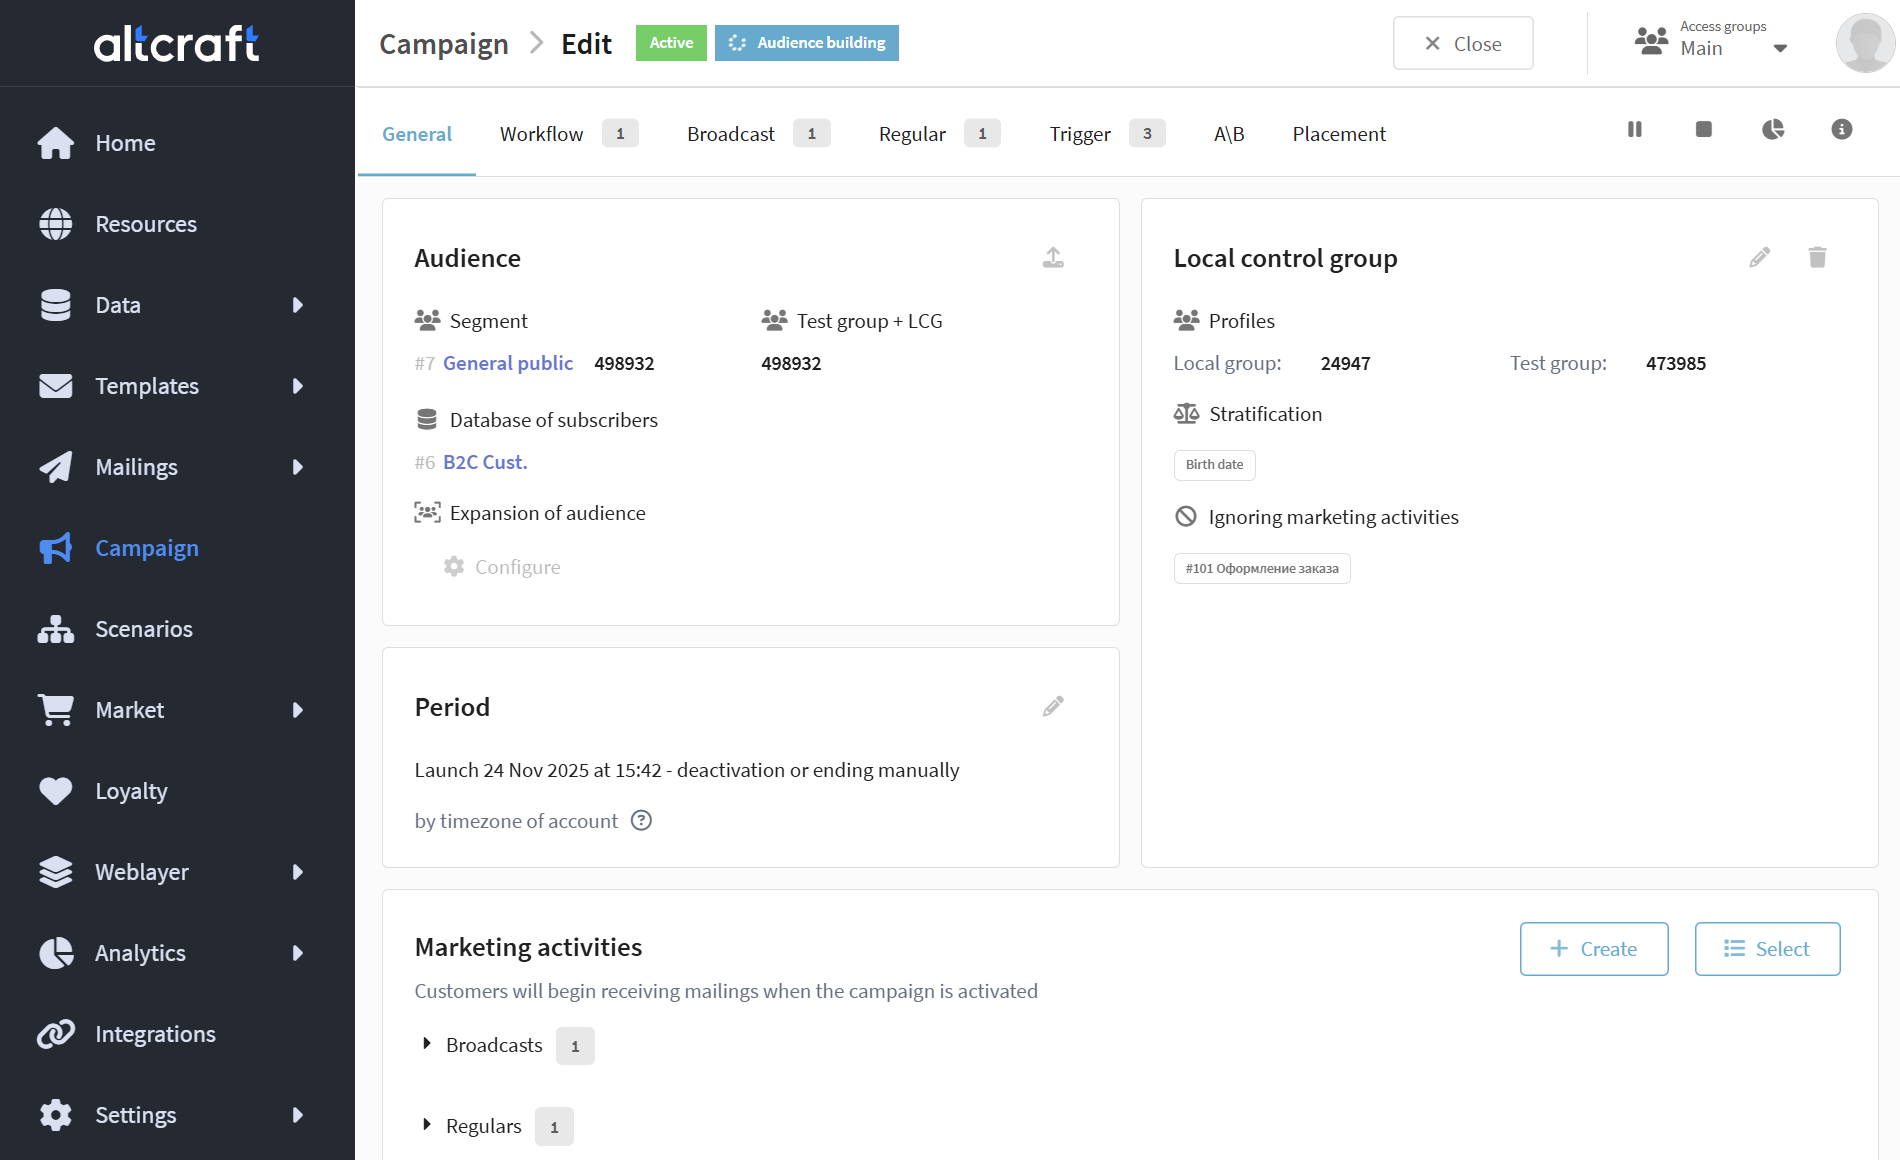
Campaigns are a tool for uniting marketing activities into a single strategy and managing them from one place. A campaign can include broadcasts, regular and triggered Messages, scenarios, A/B tests, and placements. You can configure test and control groups to achieve marketing goals, track strategy performance, and manage the lifecycle of activities from a single interface:
Creating a campaign
Before creating a campaign, prepare a static or updatable segment for the target audience. It will be needed when configuring the campaign and determines who will participate in the activities.
The campaign audience is the current composition of the segment at the time of campaign activation and each subsequent segment update.
- Profile not in segment = profile not in campaign audience
For example:
The campaign is configured with an updatable segment.
The segment is set to weekly update on Mondays with the condition "purchase within the last 7 days":
A profile makes a purchase on April 9 (Sunday).
- April 10 (Monday) — the nearest update. The profile enters the segment and therefore the campaign, since the purchase was within the last 7 days.
- April 17 (Monday) — the next update. Since there were no purchases from April 10 to April 17, the profile no longer meets the conditions and is removed from the segment and, accordingly, from the campaign.
For a static segment
A profile will also be removed from the campaign audience if it ceases to be a member of the static segment. This can happen when:
- manually deleted from the segment;
- deleted by conditions;
- deleted via API;
- deleted via a scenario;
- any other way of excluding a profile from a static segment.
Profile exit from campaign If a profile leaves the segment audience, it will also leave the campaign audience. In this case:
- The profile receives a "Campaign exit" event;
- All active campaign scenarios for this profile are deactivated;
- If the profile later re-enters the segment, it will be added to the campaign as a new one and will undergo re-labeling.
When using an updatable segment as the main campaign segment, the audience expansion function is not available.
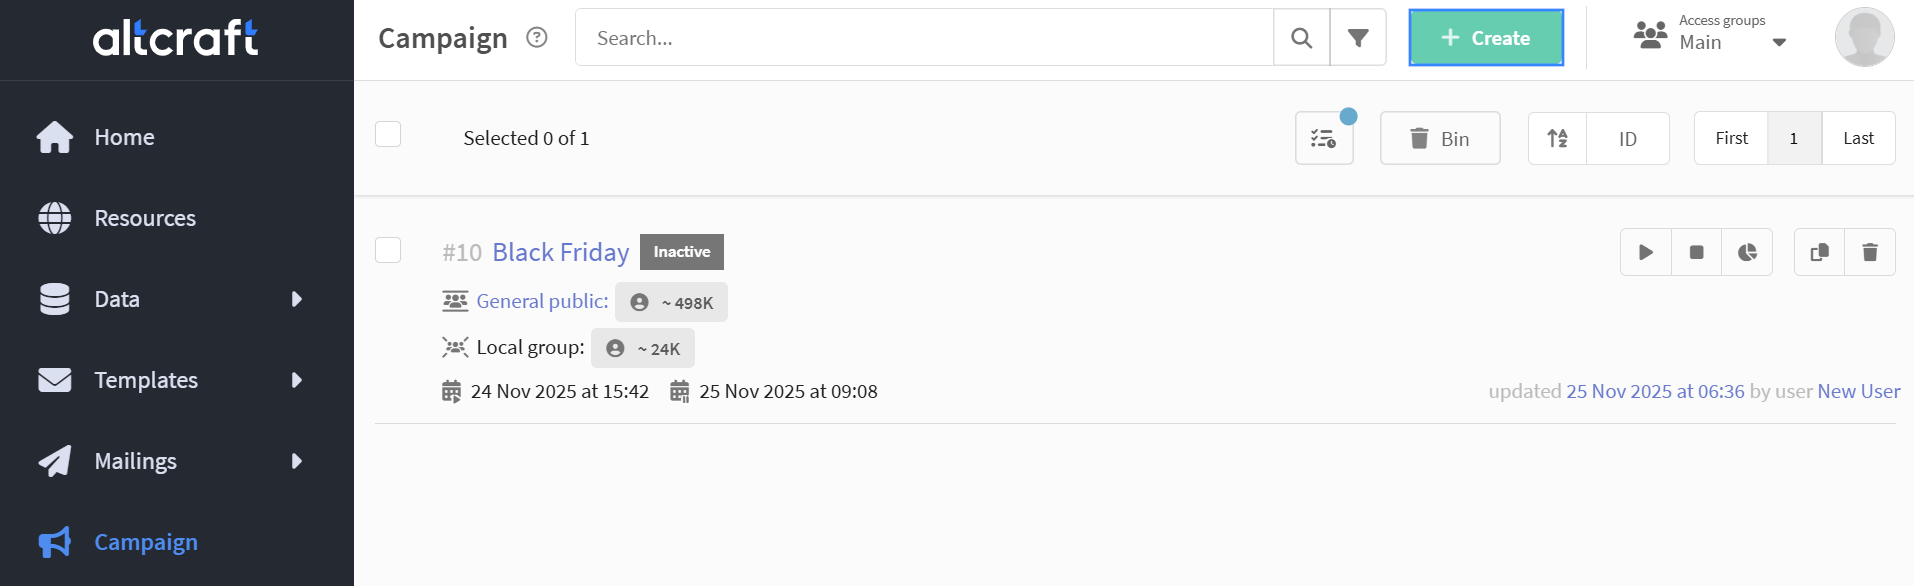
Open the Campaigns section in the main menu and click + Create in the campaign list:
On the first step, specify the name, select the profile database and a static or updatable segment that defines the target audience.
If mandatory attributes are configured in the system, you must also select them at this stage.
The selected segment defines the campaign audience. Upon activation, the system splits it into two parts:
- Test group — profiles that will receive campaign activities;
- Local control group (LCG) — profiles that do not receive activities, if LCG is enabled in the settings.
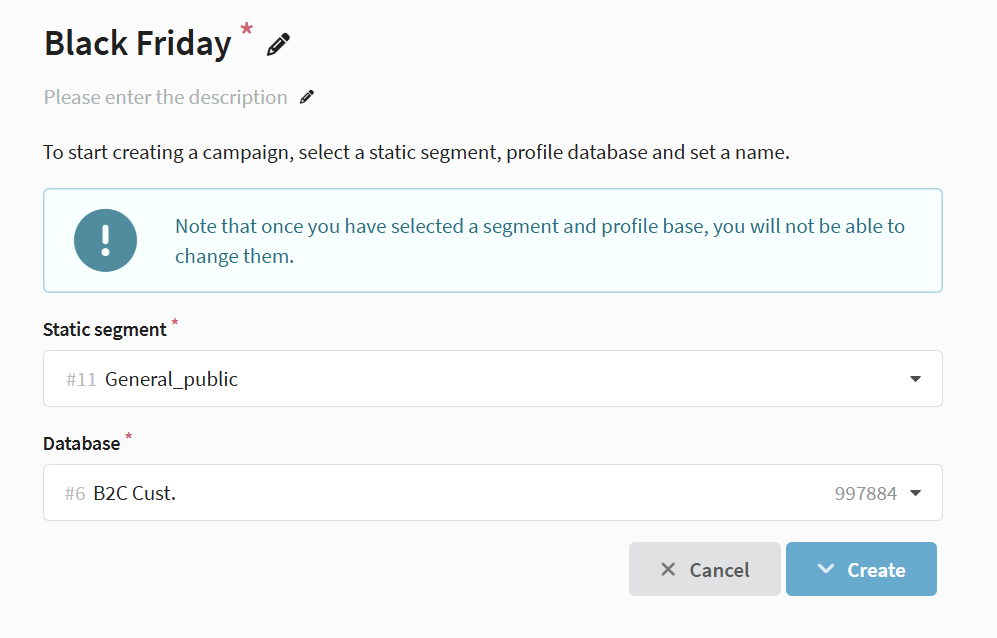
After creating a campaign, you cannot change the segment or profile database.
Managing marketing activities
In the Marketing activities section, you can manage all activities that are part of the campaign.
Activities can be created directly inside the campaign or existing ones can be added.
When selecting an activity, the following are not included in the list:
- activities from another profile database;
- Messages and scenarios with status "Active" or "Completed";
- scenarios with active profiles;
- activities already used in other campaigns;
- broadcasts and regular Messages that have been activated at least once.
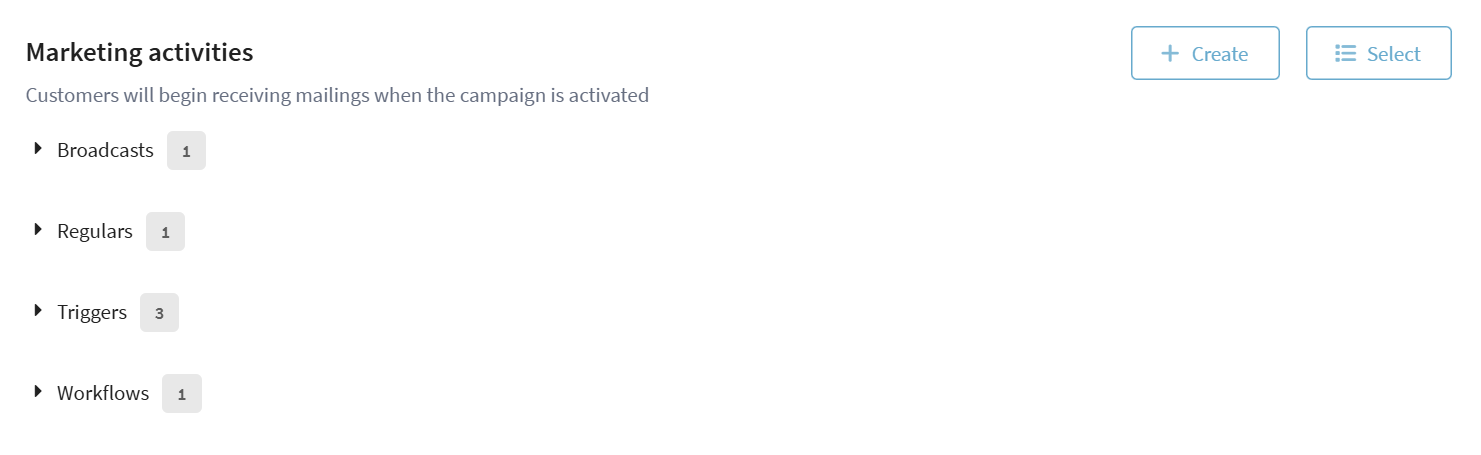
The following activity types are available:
- Broadcasts — one-time mass sends;
- Regular Messages — scheduled sends;
- Triggered Messages — automated sends based on events;
- A/B tests — variant comparison to achieve marketing goals;
- Scenarios — multi-step automations;
- Placements — content display to subscribers on a selected resource.
When creating an activity, you can select any mailing segment if you need to refine the audience. You cannot select any profile database — it always matches the campaign database. If the selected activity segment differs from the campaign segment, the system checks the intersection between them: the message will be sent only to profiles that belong to both segments.
How intersection works
Partial segment overlap
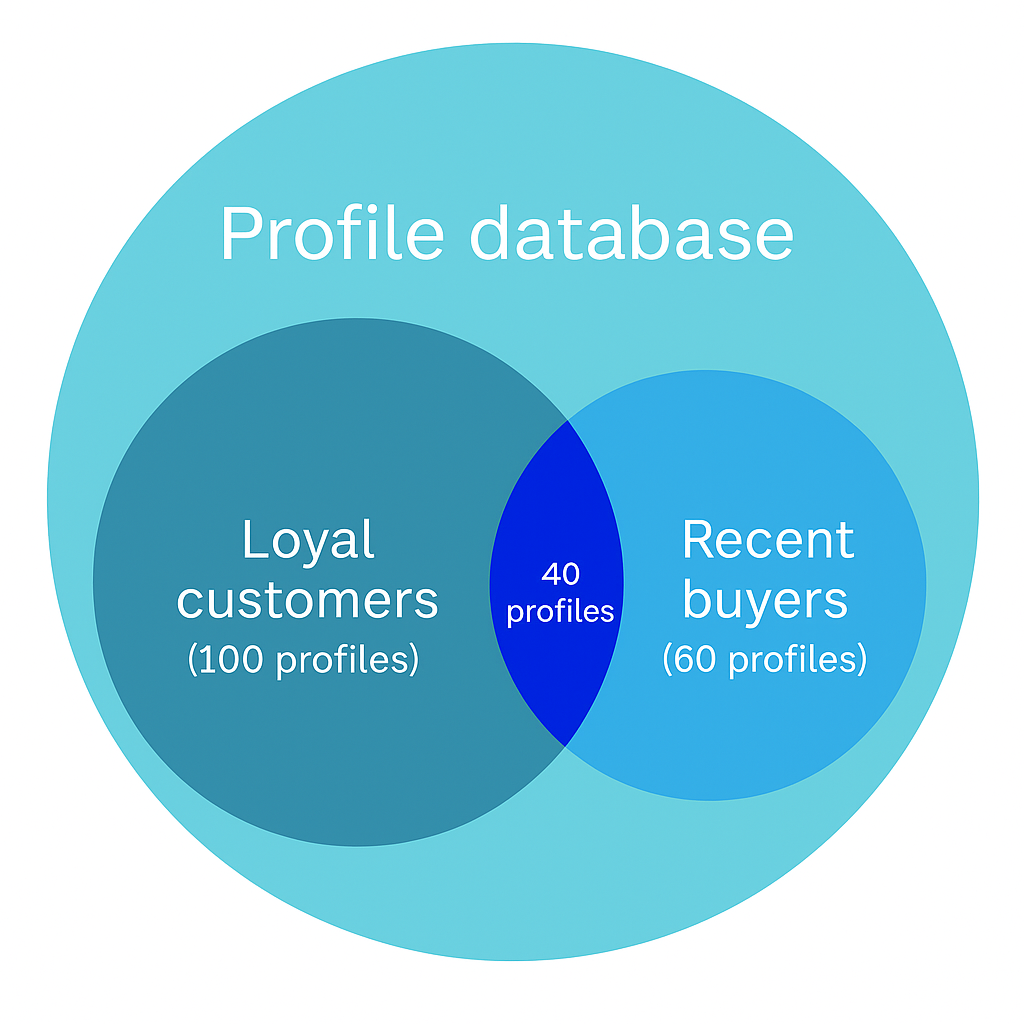
The campaign is configured with the profile database CRM_Base and segment Loyal customers, which contains 100 profiles of active customers.
A marketer wants to send an additional message only to those who recently placed an order. To do this, when creating a broadcast, they select a different segment — Recent buyers, which has 60 profiles. Of those, 40 overlap with users from the Loyal customers segment.
In this case, the message will be received only by these 40 profiles — those who belong to both the Loyal customers and Recent buyers segments. Other campaign participants will not receive the message.
This is useful when you need to configure a separate activity for a specific group of users without changing the main campaign.
For example, you can select a narrower segment — active customers, promotion participants, or users from a specific region — and send them a message related to their interests or current marketing goals.
Segments do not overlap
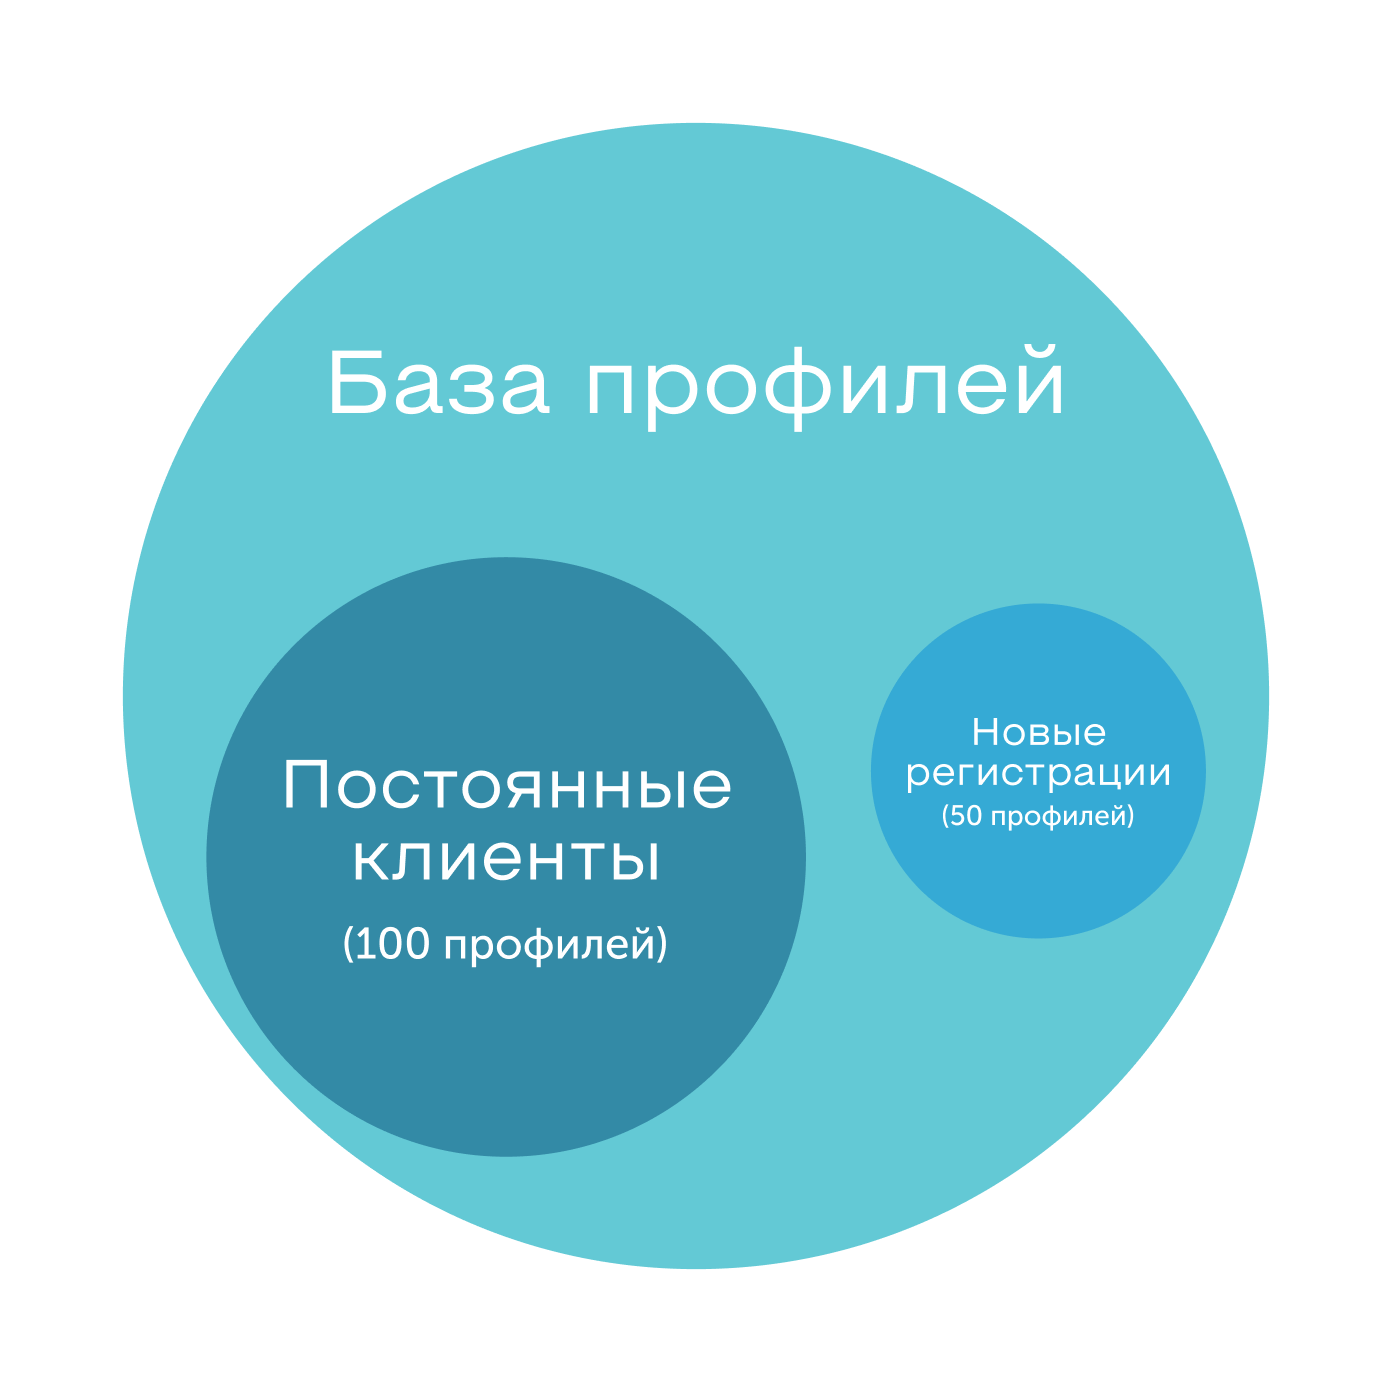
The campaign uses the profile database CRM_Base and segment Loyal customers (100 profiles).
A broadcast is created with the segment New registrations (50 profiles), which includes users who only created an account and have not yet taken any actions.
Since there are no common users between the segments, no one will receive the message.
Moving an activity
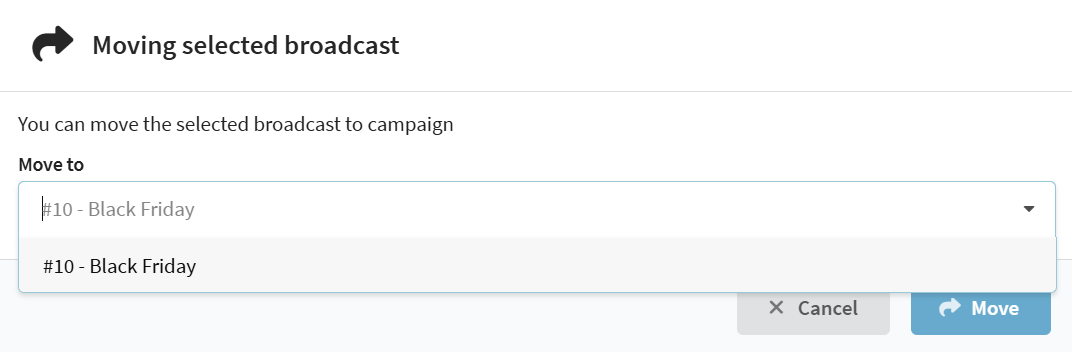
You can also add or remove an activity from the Messages menu. To do this, find the desired activity in the list and click Move:

In the opened window, select where to move the activity — to the external list or to a specific campaign:
Not all activities can be moved:
- Activities with status "Active" or that have already been launched;
- Scenarios with profiles;
- An activity cannot be moved to a completed campaign.
Configuring local control group (LCG)
What is a Local control group
Local control group (LCG) is a part of the campaign audience that does not receive activities from this campaign. It is used for more precise audience management and for analyzing the impact of campaigns on users. Currently, the LCG analytics function is not available in the platform.
Local control group (LCG) works only within a single campaign and is configured in its settings.
Global control group (GCG) applies to the entire profile database and excludes selected users from all activities on the platform.
If a profile belongs to GCG, it cannot participate in a campaign, except when this campaign is added to the exceptions.
GCG is configured in the profile database settings. More details in the separate article.
Basic LCG setup
In the campaign settings, you can select what portion of the audience will fall into the local control group.
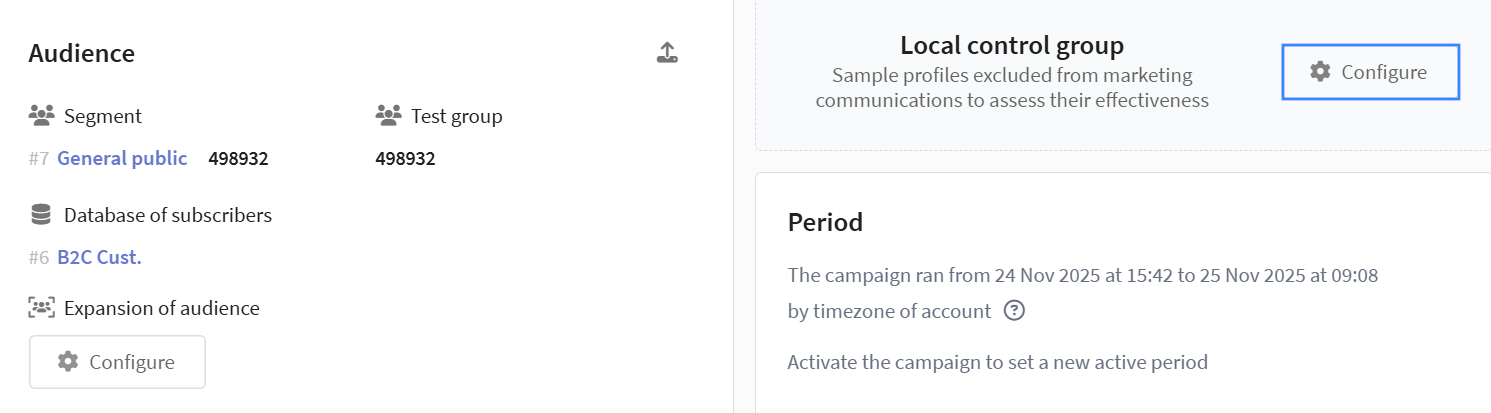
To configure LCG, specify the percentage of users to exclude from sends within the campaign. If you enable the Audience limit option, you can set not a percentage but an exact number of profiles that will enter the LCG.
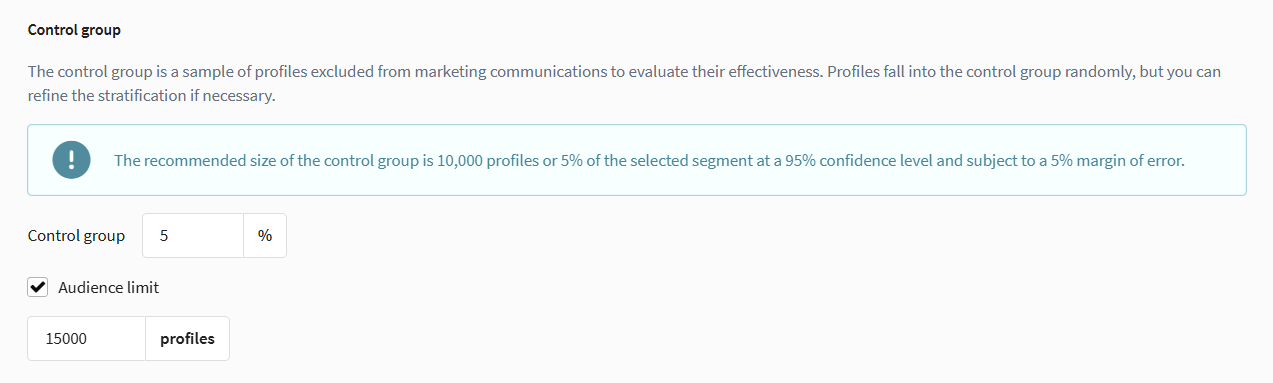
If you plan to use a local control group, it is recommended to configure LCG before launching the campaign:
After changing the parameters, Audience building starts: during this time, all broadcasts and regular Messages are paused until the process is complete.
To avoid delays and errors in campaign operation, configure the control group in advance, and then activate the campaign.
If the campaign is configured with an updatable segment, Audience building will be triggered with each update.
After campaign activation and completion of labeling, only new users will enter the local control group. Users who were already placed in the test group at the time of activation are not moved to LCG — the test audience composition is fixed during labeling.
Stratification
Stratification is a method for more precise formation of the local control group.
With stratification, the audience is divided into subgroups by selected characteristics (for example, age, city, customer type), and a portion of profiles is randomly selected from each subgroup for the LCG.
Stratification configuration is available in the LCG settings window via a dropdown menu. Select one or more fields to define strata and specify conditions for each group (for example, value ranges or lists of items):
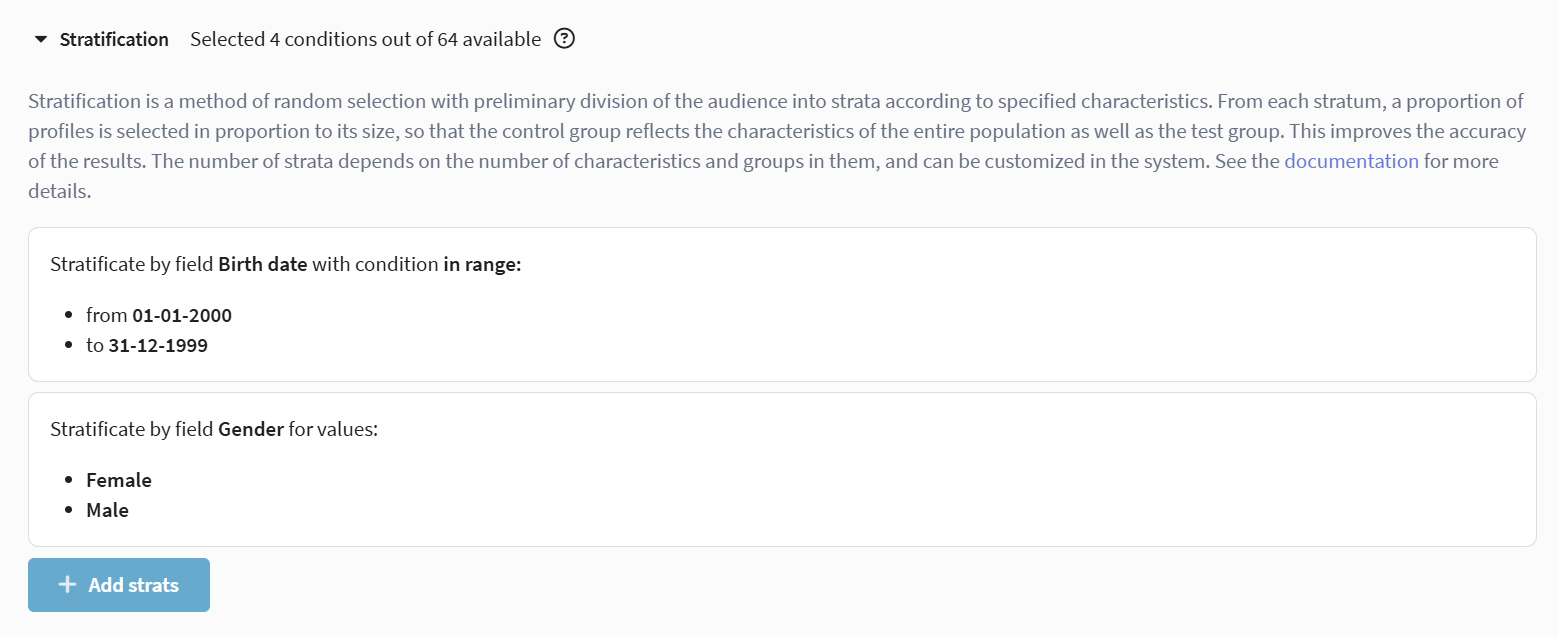
Usage example:
A marketer needs to include men and women from two age groups in the control group:
- from 20 to 25 years old (date of birth from 01.01.2000 to 01.01.2005);
- from 25 to 40 years old (date of birth from 01.01.1985 to 31.12.1999).
To do this, they select the fields Gender and Date of birth, define two date-of-birth ranges, and add gender values (male and female). The system will form four strata — men 20–25, women 20–25, men 25–40, and women 25–40 — and distribute participants between the test and control groups according to the settings.
It is not recommended to change stratification settings in an active campaign or for an already formed LCG, as the composition and homogeneity of the control group may change.
More details on system behavior for each type of change — in the article Local control groups, section Stratification changes in an active campaign.
Ignoring marketing activities
Ignoring marketing activities allows you to select Messages or scenarios within a campaign that will be sent to all users, including LCG participants. This is useful for messages that must reach the entire audience regardless of control group participation. For example, you need order notifications to reach the recipient even if they are in the control group.
To do this, in the LCG settings, select the desired activities via the dropdown menu and mark them as exceptions. Such Messages will be sent to all users without restrictions:
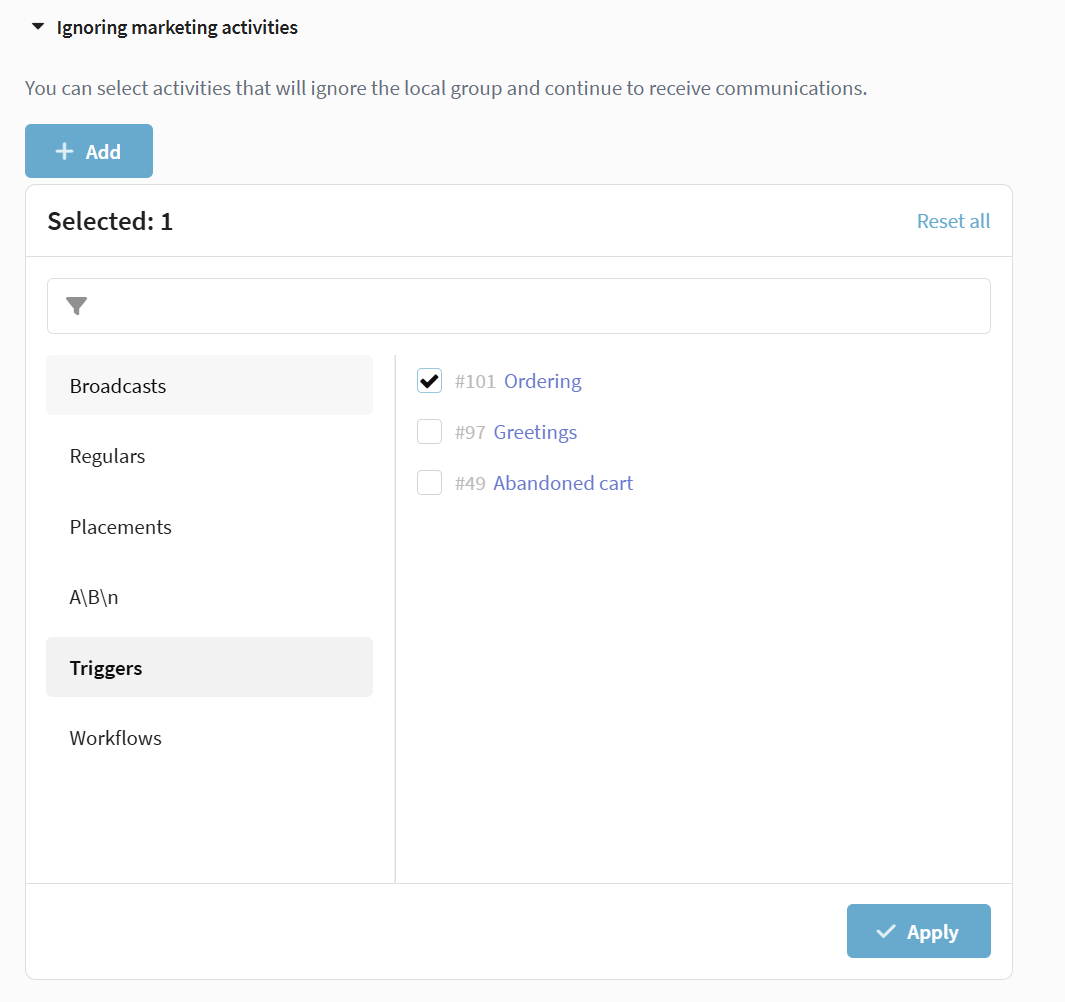
More details on configuration in the article Local Control Groups.
Status management
Campaign activation
Activation is available only for campaigns that have at least one marketing activity. If no activities are created in the campaign, it cannot be launched.
To activate the campaign, click the ▶ button on the top panel of the editor. After clicking, a window for configuring launch parameters will open.
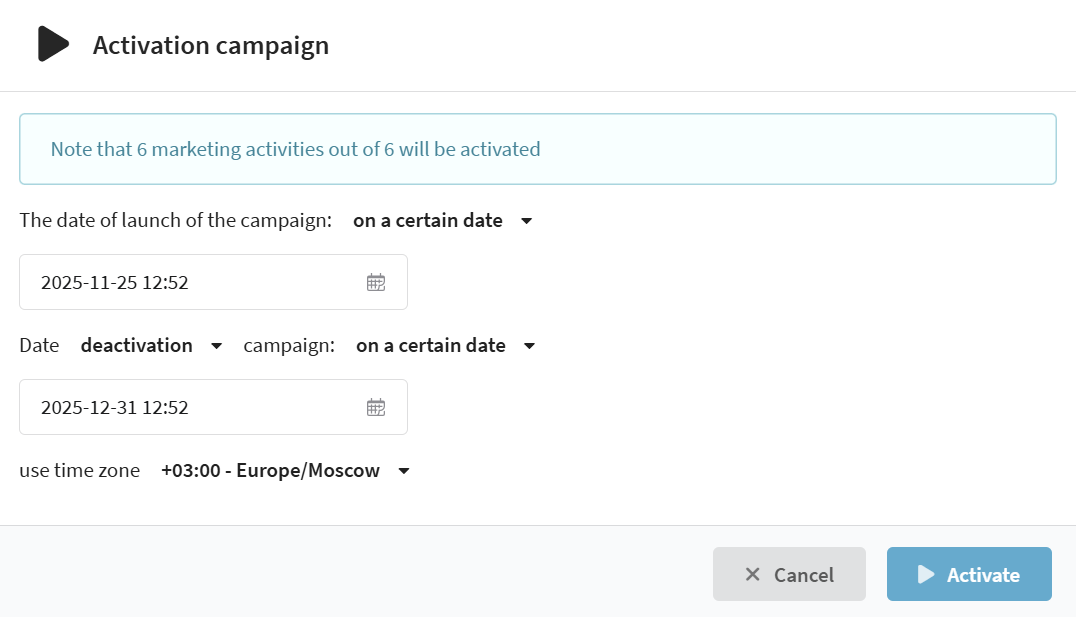
Two activation options are available:
- Activate now — the campaign launches immediately after saving. The process of labeling the audience into test and control groups begins, after which all activities within the campaign start working according to their settings.
- Activate on a specific date — the campaign is scheduled to launch at the specified time. The system will automatically activate the campaign on the selected date and time.
Be careful when selecting the date and time for launching the campaign. If you specify a past date, the campaign will wait for launch indefinitely and will not display a warning.
Activating a campaign does not automatically launch activities inside it.
If Messages, scenarios, or other activities are in the "Inactive" status, they must be launched manually.
Completion settings
In the same window, you can set conditions for automatic deactivation or completion of the campaign:
- Deactivation — temporary stop of the campaign on a specified date. All active Messages are paused, profiles retain their group membership.
- Completion — full end of the campaign on a specified date. All profiles are excluded from the audience, and activities stop working.
A completed campaign cannot be activated again.
More details on campaign statuses
| Status | Description and impact on activities |
|---|---|
| Inactive | Assigned after campaign creation and remains until launch. Activities within the campaign do not run. |
| Audience building | Audience calculation and distribution of profiles between test and control groups is in progress. During calculation, broadcasts and regular Messages are paused. |
| Waiting | The campaign is activated with a delayed start. The campaign launch will begin automatically on the specified date. |
| Active | The campaign is launched, the audience is calculated. Activities run according to their settings. |
| Audience exclusion | The system excludes profiles from the campaign and detaches them from scenarios. New Messages do not launch. |
| Completed | The campaign is fully stopped. Activities stop working, re-launch is not possible. |
Working with profiles
Forming test and control groups
After campaign activation, the Audience building process begins — the system distributes profiles between the test group (TG) and the local control group (LCG), if it is configured.
If LCG is not used, the entire campaign audience becomes the test group.
Audience building is triggered only after activation of the campaign.
Audience expansion
Audience expansion is a mechanism that allows automatically adding new users to a campaign if they participate in selected activities.
This mechanism helps increase campaign reach and keep the audience up to date without manual segment updates.
When using an updatable segment as the main campaign segment, the audience expansion function is not available. New profiles enter the campaign audience only as a result of segment recalculation.
When an activity runs with expansion enabled, the system checks whether recipients belong to the campaign and adds those who are not yet participating. New profiles are automatically distributed between the test group and the local control group (if LCG is enabled). Users from the test group will receive the activity, while LCG participants will not.
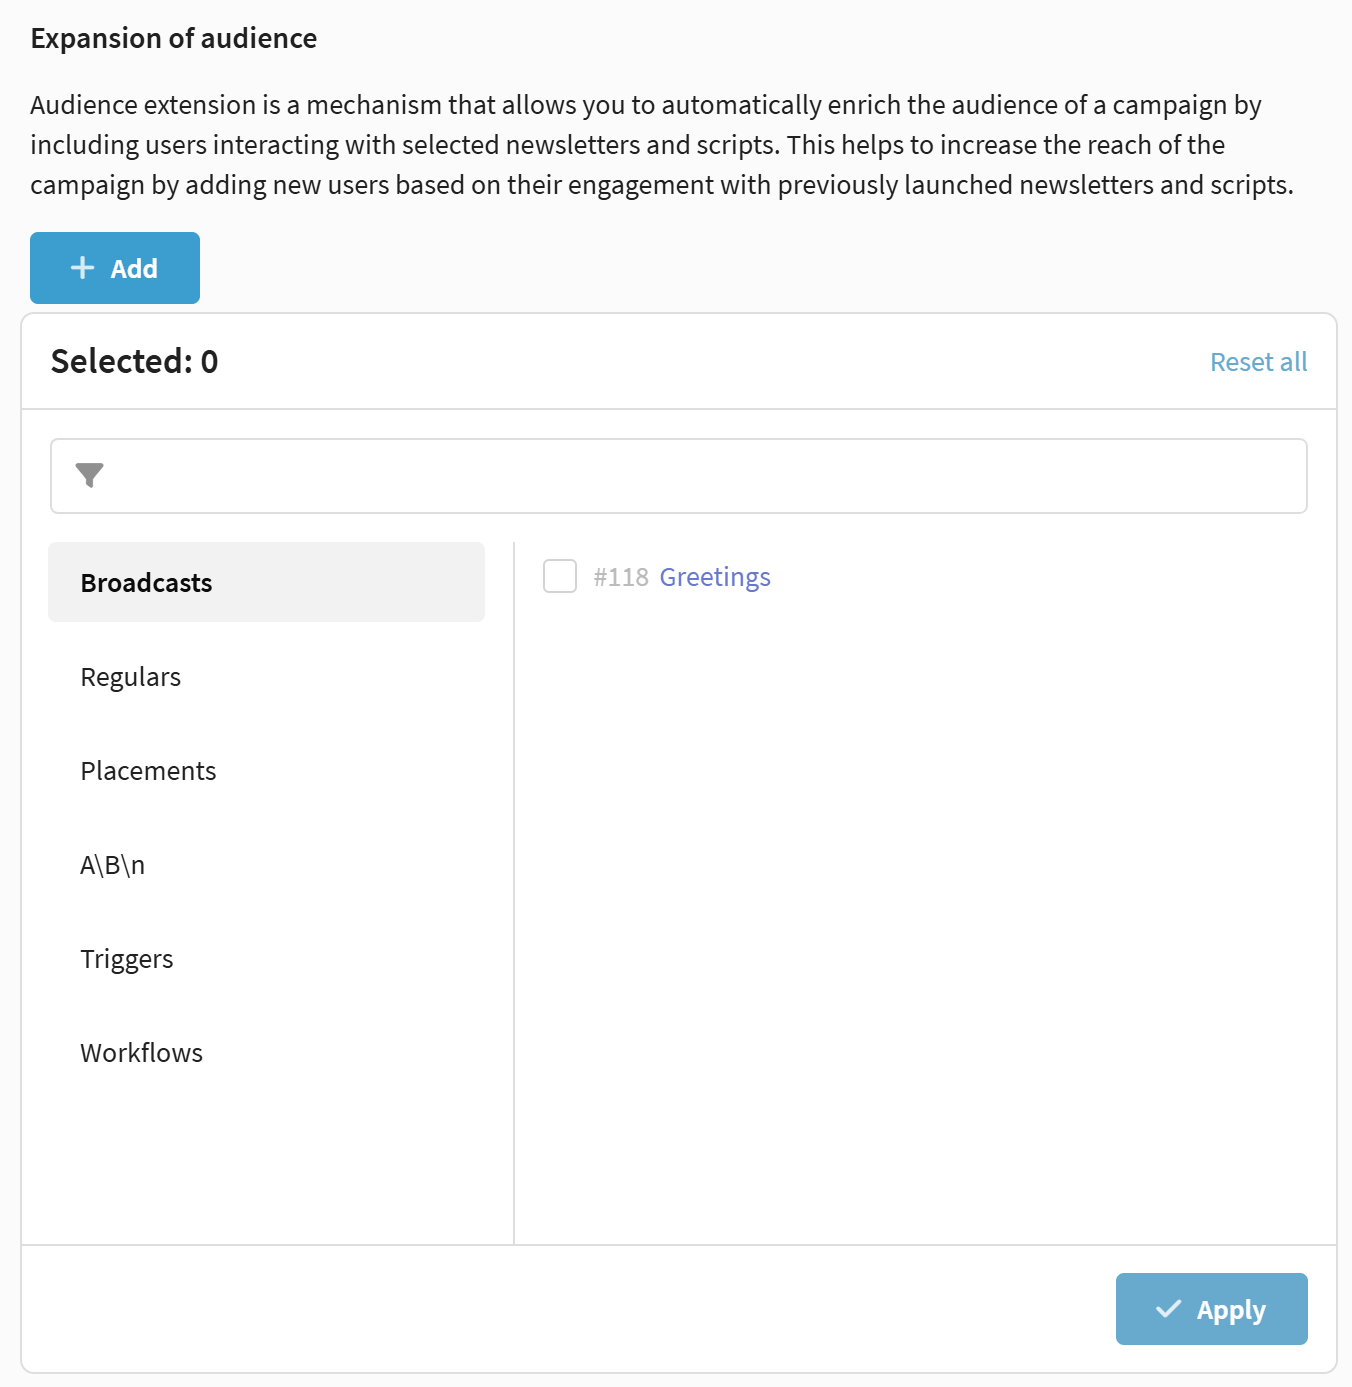
Audience expansion examples
Scenario without audience expansion
The campaign uses the profile database CRM_Base and segment Loyal customers (100 profiles).
A broadcast is created with the segment New registrations (50 profiles). These users do not belong to the campaign and do not overlap with its main segment.
When the broadcast is launched, the message will not be sent to anyone, because there is no intersection between segments — these profiles are not in the campaign.
Scenario with audience expansion
If you add the broadcast to the Audience expansion list in the campaign settings, the system will include all recipients from the New registrations segment in the campaign.
After that, profiles will be automatically distributed between the test group and the local control group.
Users from the test group will receive the message, while those who fall into LCG will not receive activities.
Thus, an activity added to the audience expansion list not only performs the send but also replenishes the campaign with new participants.
More details on configuring and using this mechanism in the separate article on audience expansion.
Manual profile addition
Manual profile addition to the campaign audience is available only for static segments.
If needed, individual profiles can be manually included in the campaign, for example for testing or checking activity operation. Addition is performed from the profile card: in the Interactions block, Campaigns section, select the desired campaign:
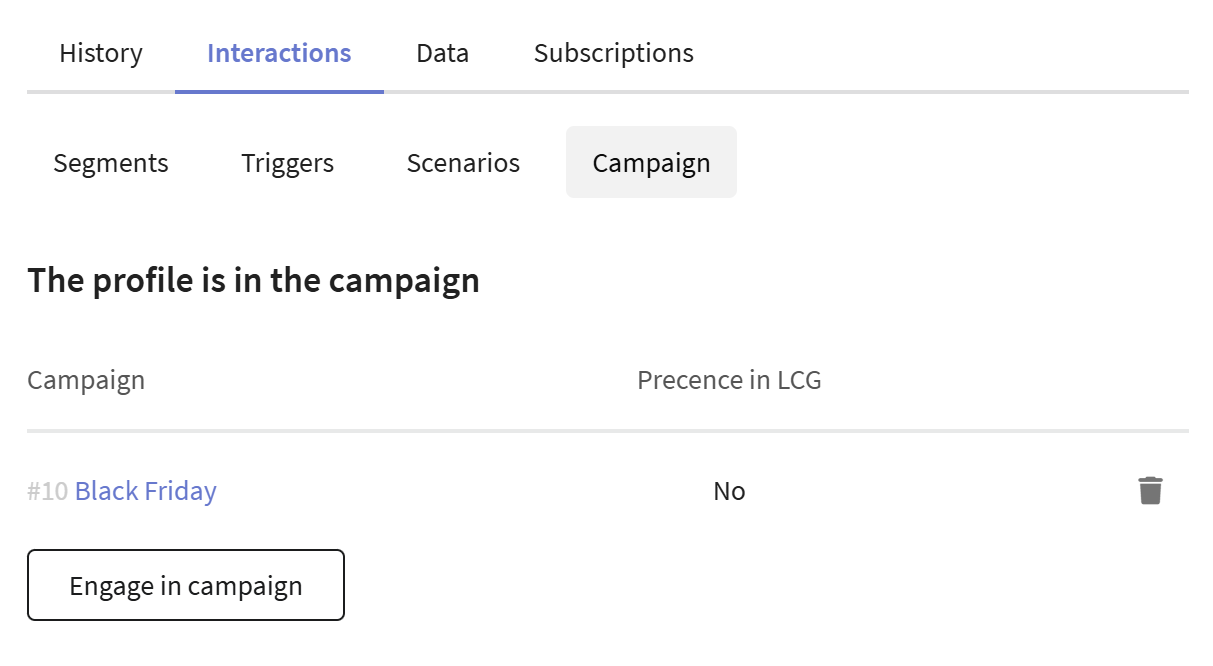
To make the profile participate in activities, check the box Send profile to test group even if it is in the control group — in this case, the profile will be forcibly placed in the test group, even if it belonged to the local or global control groups.
Campaign analytics
To view the campaign report, click the Analytics button on the top panel of the editor.
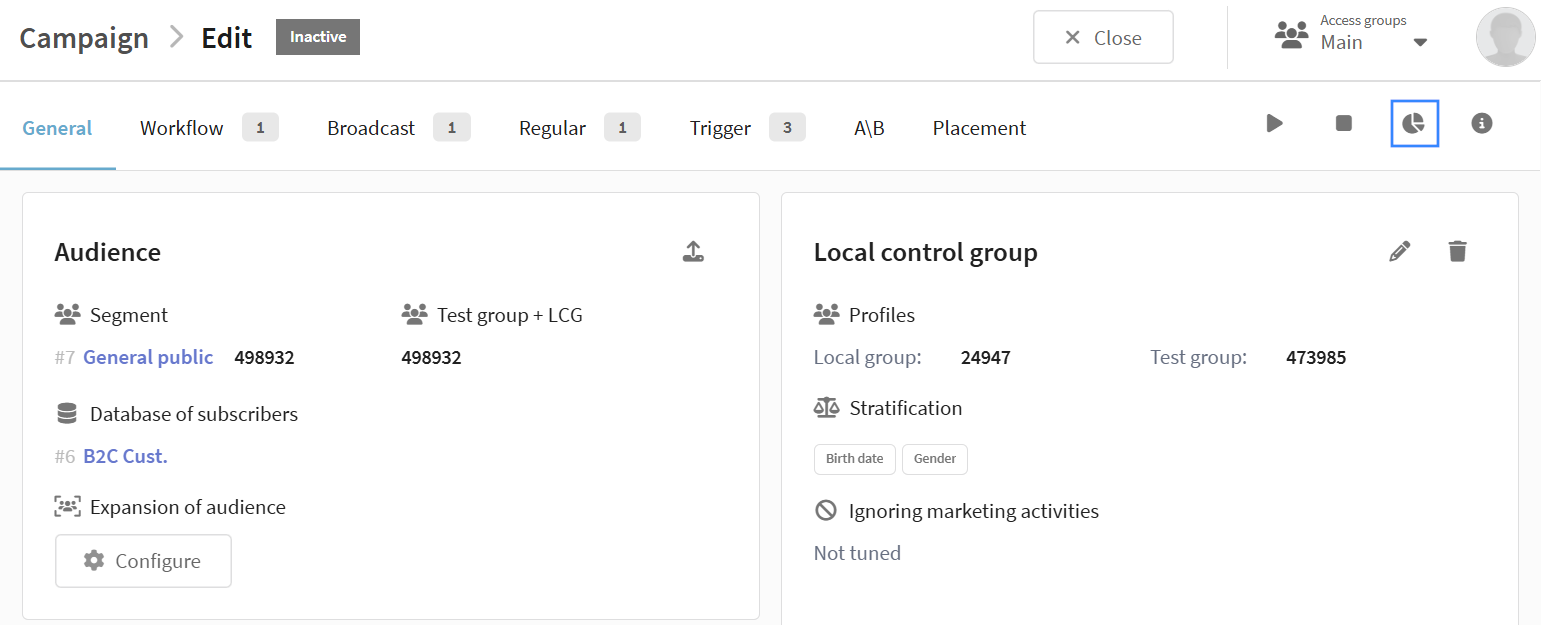
After clicking, the system will automatically open the Analytics section with a filter already applied for the selected campaign.
In this report, you can view metrics for each mailing and scenario included in the campaign:
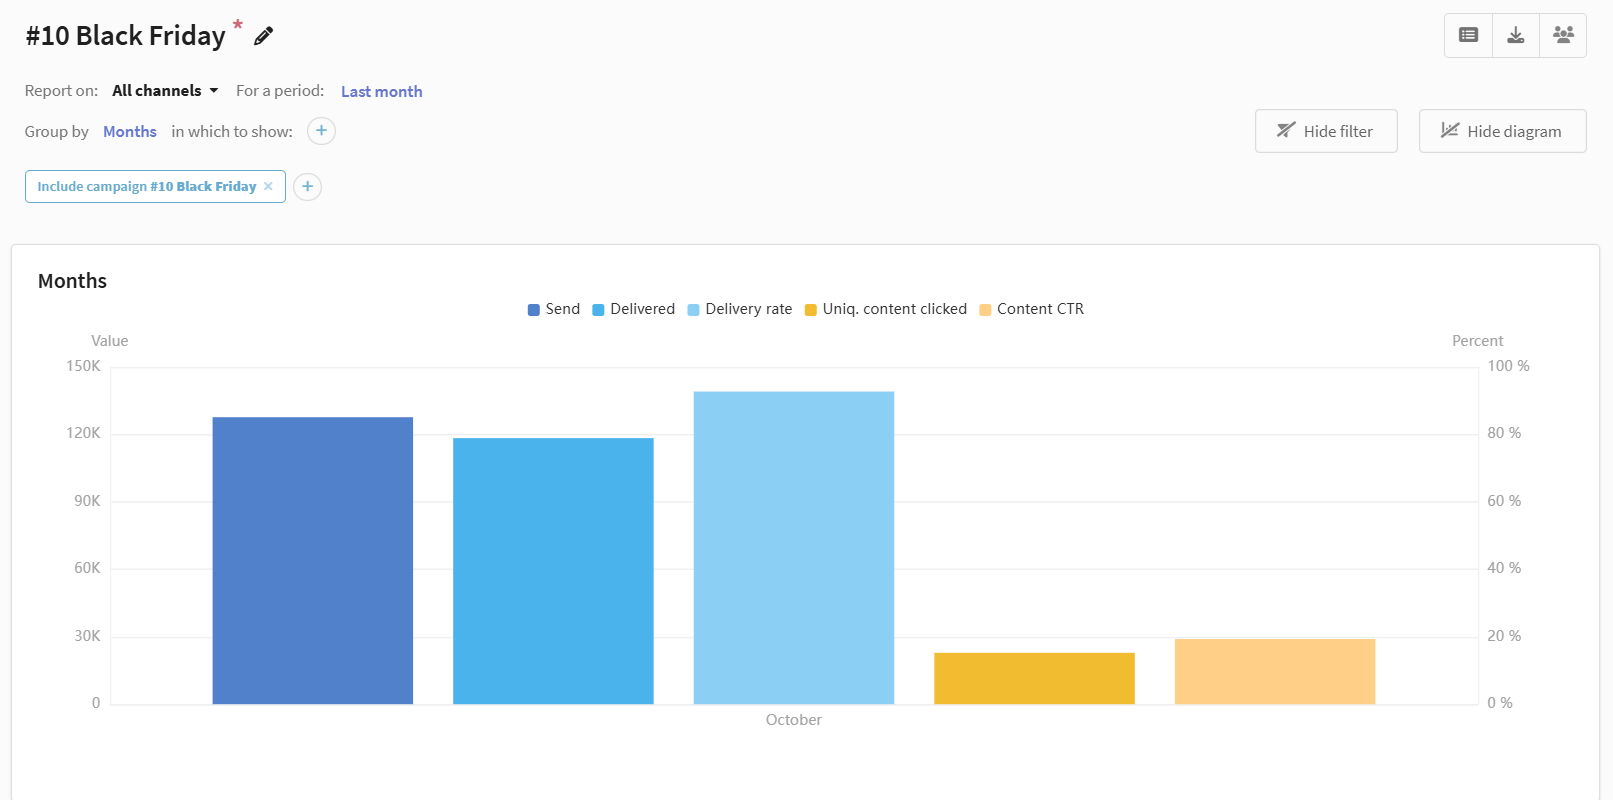
Additional features
Profile export
Export of profiles from the campaign is available with various filtering parameters. The function is located in the Audience section:
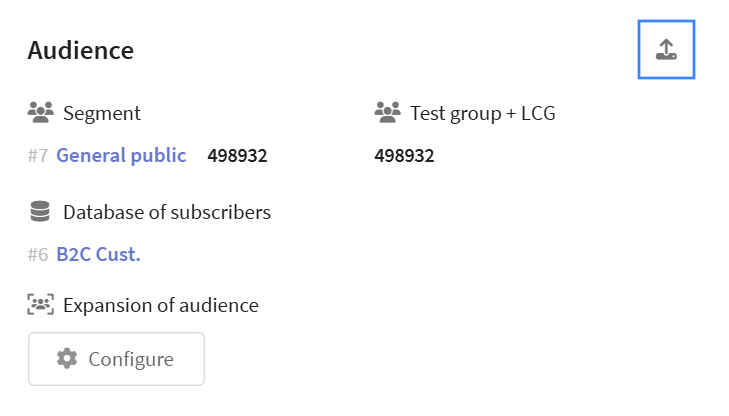
Available export parameters:
- Filtering by subscription status
- Audience selection (Test group, Local control group, Global control group)
- Field selection for export (core, behavioral, system, custom)
- Profile quantity limit configuration
Profile export is available only after Audience building is complete.
More details on working with data export in this article.
Campaign cloning
Cloning a campaign creates a full copy with all settings and marketing activities. This is useful when you need to launch a similar strategy for a different audience or test changes on a copy of a working campaign.
To clone a campaign, in the campaign list click the icon  Clone in the context menu of the desired campaign.

After cloning, the editor of the new campaign will open, where you can change its parameters. All original settings are preserved during cloning, including the local control group, stratification, marketing activities, and audience expansion.
The database cannot be changed during cloning — the new campaign will use the same database as the original. However, you can change the audience segment to configure the test group.
The new campaign is created in the "Inactive" status with inactive marketing activities. A separate activation will be required to launch it after configuring all parameters.
Campaign deletion
Deleting a campaign moves it, along with all related marketing activities, to the recycle bin. A campaign can be deleted in the "Completed" or "Inactive" status — provided there are no labeled profiles in it.
To delete a campaign, open the campaign list and click  Delete campaign. Then confirm the action in the opened dialog window — the campaign will be moved to the recycle bin.
After deletion, the campaign and all activities included in it are moved to the recycle bin.
The campaign can be restored, but it will return in the Completed status and will not be able to be activated again.